Video tutorial: How teams use the QA Navigation Board

The QA Navigation Board enables teams to make targeted and efficient decisions for every software project with regard to aspects of quality assurance, their order of priority and their implementation. We have created a short video tutorial to explain how it works.

Figure 1: QA Navigation Board for practical application

How the QA Navigation Board works

Every software project is characterised by its own individual focus. The resulting quality requirements are equally as specific. For this reason, suitable measures – according to each topic – must be established in order to test these quality requirements. With this in mind, we developed the QA Navigation Board to accurately evaluate the methods and plan the sequences in a meaningful way: The Board is an aid that enables teams to organise testing for software projects in the best possible way. The following questions are taken into account: What needs to be tested, how, to what extent, where and when?

Video Tutorial (German only)

An introduction to the tool is helpful, as it ensures that the Board can be used correctly and without delay. We have therefore explained how it works in a supporting video tutorial. How is it structured? In an ideal world, which test planning steps should be carried out in sequence and why? This enables the user to make the best possible start, step by step.

Experiences using the QA Navigation Board

The QA Navigation Board is already being used consistently and with great success across numerous projects. Teams that have used the Board say that: It is inclusive of every single member of the team and their respective skills. It ensures that no aspect of the software is overlooked and that quality assurance takes place in line with their objectives. Working with the QA Navigation Board therefore ensures clarity, gives a clear focus and allows for collaborative creation across the whole team in a workshop.

Introductory workshop

For teams that want to incorporate the Board into their processes, we are still offering a detailed schedule for running an introductory workshop for the QA Navigation Board. A detailed description of how to complete the Board as well as the meaning behind each individual point can be found and referred back to at any time here.

When it comes to recognising and eliminating typical QA problems and their effects, the Board can be used as a tool for the “case history of the QA strategy for agile teams” – a description of the procedure is available here.

The Test Analyst – Just a Reviewer for Automated Test Cases? A Field Report from an Agile Environment

Introduction

In an agile environment, regression testing helps to maintain a high level of quality. With each user story, newly developed functions are added, while the old functions still have to work. By the tenth sprint, the effort involved in the regression is so high that it is impossible to test everything manually. The only solution is test automation.

If a project is built from scratch, it is possible to properly integrate the test automation from the start. At the same time, the tester often feels like a lone warrior facing several developers. Now then, how can we realize the time-consuming automation of the functions in the daily work of a test analyst?

Project environment

In our project, we are creating new software in a JavaScript environment. It is implemented by means of the Electron framework. Consequently, Spectron is the preferred tool for the automation of test cases. Jira is used for the project platform, and the project is implemented based on the scrum model. The project team (based on FTE) consists of:

  • 6 developers, incl. 1 architect
  • 1 scrum master
  • 1 business analyst
  • 1.5 testers

Concept

It was obvious from the project kick-off that the testers would not be able to do the test automation. Therefore, the team came up with the following solution:

  • the test automation is done by the developers
  • the review for the test cases is done by the testers
  • the creation and approval of the Spectron test cases are codified in the Definition of Done

Advantages

  • Time saved in testing: The real reason for this procedure is the scarcity of resources on the testers’ part. If they had had to take on the automation as well, the entire project would not have been possible.
  • Change of perspective in testing: The testers can learn quite a lot in the discussion and review. For example, the implementation becomes clearer when questions are asked about why a test has been written this way. This can result in test cases that would otherwise not have been thought of.
  • Development of know-how: Since writing tests while the development is underway is routine work for programmers, the basic understanding regarding the creation of automated tests is generally very good. In our project, this has already proven useful for several reasons:
    • Parts of the applications could be covered using technical tricks that a tester would not have been readily able to provide, e.g. automated testing of the correct representation of a point cloud in a chart and the display of the details of a selected point.
    • Technical refinements enabled us to significantly improve the performance and stability of the Spectron tests.
    • After changing the tools used, the duration of a complete Spectron run was reduced by half an hour (time savings of 25%)
  • Change of perspective in development: Due to the fact that the developers concerned themselves with the user’s perspective regarding the functions and the interface of the software, a large number of errors could be avoided, and the basic understanding increased due to the intense interaction with the testers.

Disadvantages

  • More time required for the developers: The time saved in one place is needed elsewhere. However, the work can be shouldered by several people in this case.
  • Structure: Developers classify test cases into logical areas from a technical point of view. As they are not always identical to the functional logic, testers may have trouble finding and reviewing specific test cases.

Challenges and solutions

  • Traceability DEV QA: The review is done in Git (diff tool) in the project. In the project, the test team reviewed modified and newly created Spectron test cases, but not deleted ones, based on the assumption that those had been replaced in the course of the modification. Consequently, some requirements were no longer covered.
    Solution: To solve the problems with the review, training everybody who has to work in and review using Git on how to use Git is particularly helpful. Doing a walkthrough with the test team and the development team in the case of major modifications is useful as well to allow the testers to better understand the implementation by the developers.
Figure 1: Example of a Git review
  • Traceability of Spectron requirements: This is a challenge that was specific to our project environment. The agile team uses Jira for the requirements and test management, but in the client’s environment, the requirements and test cases have to be specified by means of different requirements management software for legal reasons. Since the systems do not know each other, automatic traceability cannot be ensured.
    Solution: To overcome this obstacle, we established a direct allocation of the Req ID to the Spectron clusters.
Figure 2: Example of direct allocation

Conclusion

In conclusion, we can say that our concept of only having the test analyst review automated test cases instead of writing them proved to be effective in our project. The division of tasks between the testers and the developers fits very well with the agile method (scrum). The advantages far outweigh the disadvantages.

This approach is perfect for an agile project that is being built from scratch with a small staff and a high standard of quality. However, you should use this method from the start. Integrating it at a later time is almost impossible because gradually expanding the test cases after each user story is much more manageable and easier than creating the test cases en bloc. Furthermore, decisions regarding the implementation, structure, architecture, and most importantly, the processes (Definition of Done, …) are made at the beginning.

Distributed working: Remote Mob Testing

Following the post on remote pair testing, now I would like to address the topic of remote mob testing. In many companies, employees work together, but in different locations, even within the project team. If you still want to use the benefits of mob testing, you can use the distributed version.

First of all, you need to understand the concept of mob testing. It is a collaborative and exploratory method that can, for example, be used to share testing know-how among the teams, or to automate testing together with the team, or to use new technologies.

Roles in mob testing

Mob testing has four different roles:

  • The driver is responsible for implementing the test ideas. They follow the navigator’s specifications, and they must not interfere with the test idea.
  • The navigator, on the other hand, is the person who has the test idea and provides the specifications in this respect. They explain to the driver how and, most importantly, why, the driver is to implement the idea.
  • The mob members observe what is happening and help the navigator develop the ideas. They can also ask questions.
  • The facilitator is the only role that does not rotate. They manage the schedule, record comments and anomalies, and act as moderator and arbitrator. They are responsible for preventing unnecessary discussions and promoting useful conversations.
Figure 1: roles in mob testing

The roles of driver, navigator and mob member rotate regularly, e.g. when a test idea has been implemented, or alternatively after several minutes. For time-based rotation, the pertinent literature specifies a standard rotation cycle of four minutes. This cycle can be adjusted as necessary. The goal is not to interrupt the current navigator in the middle of a test idea. For remote mob testing, some sources say that remote implementation works better if the rotation time is set to 10 minutes in order to avoid inopportune interruptions.

The remote concept in mob testing

For the remote approach, a smaller group is advisable. Four to six people is a suitable size to ensure a clear structure where constructive discussions are possible. The duration can be set to 1.5 hours.

For meaningful remote mob testing to be possible, you first need to choose a suitable communication tool. MS Teams or Skype, for example, work well in this context. There are different options for executing the rotation, and consequently, for the implementation by the driver.

Practical examples

Below, I am going to present two approaches that have worked well for me. It is advisable to define a sequence for the rotation during the preparation to ensure a smooth rotation. For this purpose, you can number the participants.

Approach #1: Transfer of mouse control

In this case, the facilitator shares their screen, and the driver requests control of the mouse. The mouse control is passed on when it is the next driver’s turn.

This approach works well when you are working on a test object for which you need the previous driver’s state in order to be able to continue working in an expedient manner. Personally, this is my favorite approach because it is uncomplicated and quick.

Approach #2: Transfer of screen transmission

With this approach, each driver shares their screen when it is their turn. However, this method is suitable only if it is possible to implement further ideas on the test object, irrespective of the previous test, because the last state of the previous driver is no longer available for the next screen transmission. Another option in this approach is giving several people access to the object, e.g. a user for all the participants.

Fazit

Mob testing itself is simple to do, and, like pair testing, it is a very lightweight testing method. Likewise, the two approaches that I have presented in this post (transfer of mouse control vs. screen transmission) are uncomplicated and simple to implement. Both methods have worked well and facilitate distributed collaboration.

Furthermore, there are some tools available for frequent use and/or the joint development of automated tests, for example. If you want to explore the test object and perform distributed tests quickly and straightforwardly, the two methods presented above are highly suitable.

Distributed working: Remote Pair Testing

At ZEISS Digital Innovation the distributed approach has been put into practice for a long time. Especially in corona times, this approach is more in demand than ever. The good news: Work can continue from home. But remote work is not only possible in home office, but also at different locations and offices.

Classic pairing is already used very successfully in agile software development. It is an efficient method to solve complex tasks together and to achieve the best possible result with the knowledge of two people. It is also an optimal tool to distribute knowledge. Through extensive communication of thoughts and ideas, both participants reach a similar know-how level in the end. In this article I would like to show how the distributed cooperation can be successful.

Presentation of the method: Pair Testing

Pairing involves dividing the couple into two roles. On one side there is the driver. This driver implements his test idea and communicates his thoughts to the navigator. He explains everything he does as transparently as possible. This enables the navigator to understand the driver’s approaches and steps.

On the other side there is the Navigator. He checks the driver’s inputs and also communicates his thoughts about them. In this way, new solutions can be shown and the navigator can clear up any ambiguities by asking questions. Thus both learn from each other. 

The roles change regularly so that everyone gets the chance to experience the application and implement his ideas. The change takes place after a completed test idea or after a few minutes. This is also called the rotation of the roles.

man at the wheel and woman with map
Figure 1: driver and navigator

Remote work: Technical requirements

In order to both parties being able to work remotely with each other, suitable conference software is required, e. g. MS Teams or Skype. This allows the test object to be shared via screen sharing. There are two possibilities for the working process:

  • On the one hand, the mouse control for role rotation can be requested alternately. However, this can lead to delayed work.
  • Alternatively, the screen sharing can be switched according to the role rotation. This disturbs the process less, but then both require access to the test object. Likewise, a thought cannot be continued directly, since the application is in a different state after the change.

If you follow the approach of the role change after a few minutes, any stopwatch function (e.g. mobile phone clock) can be used to stop the time. However, this can lead to problems if you are interrupted in the middle of the test idea and this idea may have to be followed up by the new driver. Therefore it is worthwhile to have the rotation performed after the test ideas are completed.

Pair Testing: General Requirements

There are other aspects to be considered in order to make distributed working a success.

The tasks for the Pair Testing Session should be large and complex enough that they can be solved in pairs. Therefore, it is important to prepare the session well, and appropriate tasks should be set. This content can be, for example, stories that are to be tested.

Focused cooperation requires a lot of concentration. It is therefore important to take coordinated breaks to regain energy. Simple tasks can also be solved quickly and effectively on their own. It is therefore advisable to create time slots in which Pair Testing Sessions are held for the prepared content. Then this can mean, for example, spending half a day testing together in pairs and the other half working alone.

Summary

Pair Testing is a lightweight method that can be used by anyone without any complications. With the right technical support it is also easy to be implemented in remote work. This way we can learn from each other and support each other in complicated tasks, despite long distances. Furthermore, working together helps to prevent remote alienation.

The QA Navigation Board workshop

The QA Navigation Board provides a visual aid to agile development teams which they can use to assess the planning aspects of quality assurance at an early stage. During the project duration, the QA Navigation Board can also be used as a reference for the current procedure and as a basis for potential improvements.  » QA Navigation Board

The QA Navigation Board is developed within the framework of a workshop run by an agile QA coach. The duration of the workshop should not exceed 1.5 hours.

Preparation

All the parties involved in the agile project should be invited:

  • Development team (developers, testers)
  • Scrum master
  • Product owner
  • Other stakeholders and shareholders

The QA Navigation Board is affixed to a bulletin board or wall. In addition, each participant receives a printout of the QA Octant as a worksheet.

Step 1:

Presentation of the QA Navigation Board and the objectives of the workshop by the host (agile QA coach), and introduction of the participants.

Step 2:

Brief presentation of the QA Octant and the quality characteristics. The goal is for all the participants to be able to complete the worksheet and to understand the quality characteristics so that they do not talk at cross purposes later.

Furthermore, the participants agree on the dimensions of the QA Octant: Which label is to be given to the intervals of the diagram (1, 2, 3 or S, M, L, XL, etc.)? Then, the worksheets are handed out and completed within 5 to 10 minutes by each participant, the name of whom is indicated on the worksheet (cf. blog post: How to use the QA Octant).

Step 3:

At the end of this time, the host collects the worksheets and puts them up on a bulletin board or wall.

The host then goes through each of the quality characteristics. For this purpose, he identifies the common denominator (average) of each characteristic and discusses the greatest deviations with the respective persons (cf. planning poker). Once the team reaches a consensus regarding the value of a characteristic, the host documents this value.

Step 4:

Based on the valuation of the quality characteristics, the participants then deduce the necessary types of tests. The higher the value of a quality characteristic, the more likely it requires testing by means of an appropriate test procedure. The team then places the types of tests determined in the test pyramid of the QA Navigation Board.

Step 5:

Once all types of tests have been determined and placed, the necessary test resources and other test artifacts can be placed on the QA Navigation Board. A checklist can help in this respect (cf. blog post: The QA Map or “How to complete the QA Navigation Board”).

Step 6:

When the team has mostly completed the QA Navigation Board, it is put up in an appropriate place in the team room. The host concludes the workshop and points out that the QA Navigation Board can be updated and further developed by the team, and also used in retrospectives.

The QA Map or “How to complete the QA Navigation Board…”

The QA Navigation Board provides a visual aid to the development teams which they can use to assess the planning aspects of quality assurance at an early stage. During the project duration, the QA Navigation Board can also be used as a reference for the current procedure and as a basis for potential improvements. But how should the types of tests and other test artifacts be placed on the QA Navigation Board?

To answer the question, “How and where do we want to test?”, the team would have to comb through the entire development process to find and document test and QA aspects. The development process can be different for every project, which could quickly make this issue highly complex (Fig. 1).

Figure 1: Development and QA process

Again, to facilitate the introduction of this topic to the teams, we have developed the QA Map. The QA Map gives the team a practical tool to plan and document the measures required for optimal testability of the projects. The objective is to determine all QA-relevant issues for the teams and development projects, using a playful approach and at an early stage.

QA map from the QA Navigation Board
Figure 2: The QA Map

After defining all the key test areas by means of the QA Octant and determining the necessary types of tests, all aspects of the test strategy, such as types of tests, resources and tools, can be visualized, discussed, and prioritized.

A good practice resulting from the workshops done in the past is using two tools to control the completion of the QA Map. The first is a competent host who leads the workshop in the right direction, and the second is using a check list. The check list comprises appropriate questions that are intended to provide suggestions in the workshop in order to complete the various parts of the QA Map. These questions are listed below and allocated to the respective field to be completed.

Requirements

  • What are the requirements?
  • Do the requirements support the preparation of the test case?
  • Can requirements and tests be linked?

Test / Code

  • Where do we place the tests?
  • Do we have the necessary skills?

Repository

  • Where do we store the test artifacts?
  • Are there different artifacts?

Test Management

  • How do we plan our tests?
  • How do we document our tests?
  • How do we report? And to whom?

Automation

  • How much test automation is required?
  • Do we need additional tools?
  • Do we need test data?

Build

  • How often do we want to build and test?
  • How do we want to integrate QA?
  • Do we want to test maintainability?

Test Environments

  • Do we have an adequate environment for every test?
  • Will we get in each other’s way?

Figure 3: Example 1 of a completed QA Navigation Board
Figure 4: Example 2 of a completed QA Navigation Board

Once all types of tests have been selected and the team has started to place the other test artifacts (e.g. tools, environments), the host can withdraw. The team should put up the final picture in the team room as an eye-catcher. This way, the QA Navigation Board plan can be used as a reference for the current procedure and as a basis for potential improvements.

Recipes for Test Automation (Part 3)

In my previous two posts, „Ingredients and appliances for test automation, and who is the chef“ and „Testomatoes on data salad with stressing“, I described the prerequisites for test automation and the challenges with respect to the test data that have to be met in order to successfully implement automated processes. Now we have to ask ourselves, what is the recipe, i.e. a test case for test automation, supposed to look like?

Figure 1: Recipe for test automation

Let us first take a look at a typical recipe. Generally, it consists of two parts: the list of ingredients (test data) and a description of the sequence in which the ingredients are to be used. The description contains both the steps required to prepare the recipe and the names of the ingredients from the list of ingredients. Recipes are more or less detailed, depending on the person for whom they are intended. Recipes for a trained chef are often much less detailed because the chef already knows certain work processes, i.e. they do not need to be described in detail. Recipes for a private household or even a novice in the kitchen have to look different. The same is true for test cases. For a tester with corresponding domain knowledge regarding the domain-driven design of their application, the test cases can be less detailed. But what about automation? Let us compare a baker with a bread-making machine. All the baker needs for a recipe is the instruction “Bake a rye bread”. The bread machine needs a precise recipe description, i.e. the sequence in which the ingredients have to be put into the machine, which program and temperature have to be selected, etc.

In quality assurance, however, where we have more than one recipe or one test case, we want to make the work easier for ourselves. Like in industrial kitchens, we make preparations that will make our work easier later. In the kitchen, the salad garnish, for example, is used for various dishes; similarly, reusable test case modules are created for test cases. For this purpose, several test steps are summarized into blocks and stored as reusable test step blocks. This method can be used both in manual testing and in test automation. Here, too, the difference is in the level of detail:  while a low level of detail may be sufficient for manual testing, automation will always require the highest level of detail.

Hands kneading a dough, baking ingredients and utensils lying on the side
Figure 2: Baking bread

vs.

Part of Code for test case preparation
Figure 3: Creating test cases

From this point of view, test automation is in fact the world’s worst cook. It would even burn water if we didn’t tell it to remove the pot from the stove when the water is bubbling. But then, why do we even use test automation? Well, test automation has some important benefits: A cook can forget an ingredient or deviate from the recipe. Consequently, the dish comes out different every time. The automation does not forget anything, and it always sticks to the sequence prescribed in the recipe. The greatest advantage of test automation, however, is the speed at which it can run the test cases. Furthermore, the cook needs a break every now and then. If we imagine such automation in the kitchen, we would get a kind of field kitchen that processes all kinds of recipes in seconds, and accurately places the result on the plate.

That makes test automation sound very tempting, but you should always keep an eye on the cost-benefit ratio. The work involved in feeding the automation with perfectly designed test cases (recipes) is often underestimated: If I have a birthday party with ten guests once a year, a cooking machine probably won’t pay off. But if I have an event business that provides à la carte food to a wedding party every day, such automation is definitely worth considering.

How to use the QA Octant?

In my blog post “The QA Navigation Board – What do you mean, we have to test that?”, I introduced the QA Navigation Board. Now, I would like to share our experience using the QA Octant contained in this QA Navigation Board to identify the necessary types of tests.

One of the questions asked at the start of a software project is: Which quality characteristics does the development, and therefore the quality assurance, focus on? To facilitate the introduction of this topic to the teams, we use the QA Octant. The QA Octant contains the quality characteristics for software systems according to ISO 25010. These characteristics also point to the necessary types of tests that result from the set weighting of the different functional and non-functional characteristics.

Depending on how much the implemented requirements affect the quality characteristics, it is necessary to check these characteristics by means of a corresponding type of test. Apps with a high data throughput for example require efficiency tests, whereas web shops should be tested for compatibility in various browsers. Thanks to the simple visualization and weighting of the different quality characteristics, the QA Octant can be used for planning.

QA octant from the QA Navigation Board

The team asks the product owner or the department: “How important is each of the quality characteristics?” The goal of this round of questions is to visualize a ranking in the weighting of the different characteristics. Most of the respondents will not really differentiate between the quality characteristics, or rather they will answer: “Everything is important!”

It is now up to the team and the host of the meeting to clarify the question to the point that such a differentiation is possible. Different questioning techniques can be used for this purpose.

Differentiation is for example possible by delimiting the area of application. If an HTML-based technical application is used in a company network, and the IT compliance regulations specify one browser and one operating system version, the aspect of compatibility and the associated tests can be ranked lower. If, by contrast, a large number of different combinations of platforms are used, extensive testing has to be planned.

For further differentiation, you can for example use a negative questioning technique: “What happens if, for example, usability is reduced?” Using the example of an application for monthly invoicing, we assume that a negative effect on the usability increases the time it takes to issue an invoice from two to four hours. Since the application is only used once every month, this “delay” would be acceptable, and usability can be ranked lower in the QA Octant.

This questioning technique can be expanded by prioritizing by means of risk assessment. “What happens, or which consequences arise if, for example, the security characteristic is lowered?” The answers result from the following aspects:

  • What financial impact would a failure of the application have if the focus on this characteristic was reduced?
  • How many users would be affected by a failure of the application if the focus on this characteristic was reduced?
  • Would a failure of the application cause danger to life and limb if the focus on this characteristic was reduced?
  • Would a failure of the application affect the company’s reputation if the focus on this characteristic was reduced?

If results and findings are available with respect to one or several of the quality characteristics, you can compare them to the open quality characteristics and proceed similarly to the complexity comparison for the planning or estimation.

Asking the right questions produces an overview of the quality characteristics. Thanks to the simple visualization and weighting of the different quality characteristics, the QA Octant can be used for planning the types of tests.

The result is not always the most important part of the QA Octant: “the journey is the destination” as well. Due to the weighting in the team and together with the PO and/or the department, different opinions are more discernible, and all the parties involved develop a better understanding.

Mobile Testing – Do I Have to Reinvent the Wheel?

Most of us cannot imagine a day without our smartphone anymore, using apps to surf the web, listen to music, or play games. Therefore, besides countless developers, numerous testers also work on mobile terminals. The question is, do testing methods change because of the new platforms?

In the beginning…

About two years ago, I had the opportunity to immerse myself in the world of mobile testing within the framework of a client project. A small team at Saxonia Systems (since 03/2020 ZEISS Digital Innovation) had started developing an iOS app. Even then, an item on my software tester agenda was: “One day, you’ll do something with apps.” And since I had always had an affinity for Apple and their high quality standards (and I own a variety of their products), I did not hesitate to accept.

From then on, I was supposed to accept the development team’s sprint result for the client every two weeks. The onboarding was quickly completed. Within hours, I had the names of the contacts within the development team, an iPad on my desk, and ready access to JIRA.

And now: Start testing!

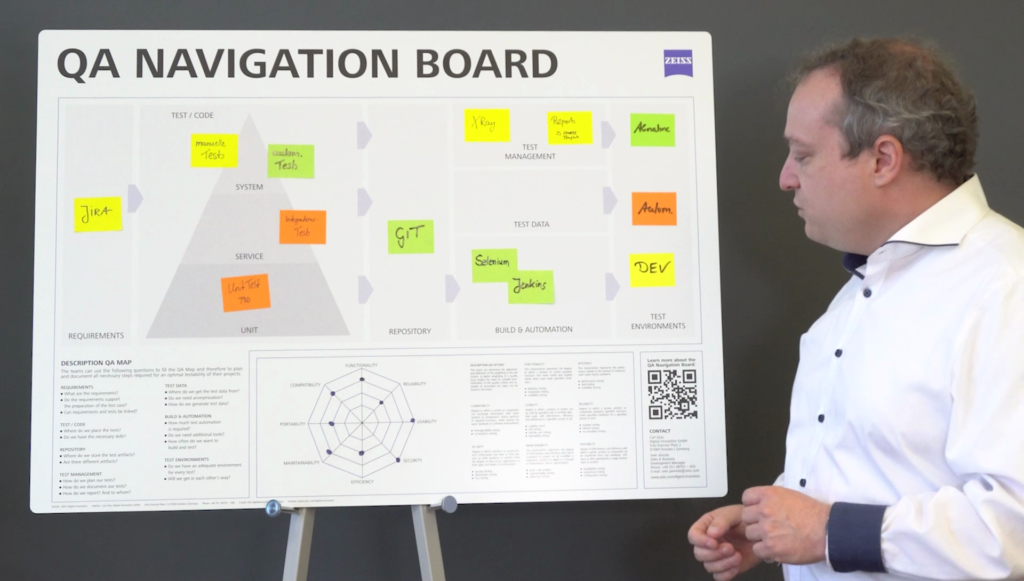
The test case specifications were very similar to what I was used to. Over the course of the development of the app, the client introduced the JIRA plug-in Xray. Anyone who has worked with JIRA before and knows the specification of test cases from other tools will quickly manage this plug-in. Since I had worked with several test management tools and with JIRA before, my learning curve with respect to Xray was quickly conquered, and soon enough I had specified my first test cases for the acceptance test.

According to the specifications, the acceptance environment was always to be equipped with the latest iOS version, reducing the combination of iOS releases and simplifying the tests. Until then, I had had to pay attention to which operating system and which service pack were installed in order to ensure that the software was supported. In the mobile sector, and with iOS in particular, the users’ quick readiness to update makes the acceptance test somewhat easier because the test artifact has to work with the current iOS version at all times.

New challenges

Now, how to transfer the sprint result to my iPad? In my previous projects for this client, all of which were restricted to desktop applications, I found an installer of the software to be tested on a shared drive every morning. I installed it on my virtual machine and was ready to start testing.

Now I was supposed to install an unpublished app on my iPad, but how? I contacted the Saxonia development team, and they told me what to do. All I had to do was give them the Apple ID used on my iPad, and to install the iOS application TestFlight. TestFlight is an online service of Apple that allows developers to make their apps available to a select group of users for testing prior to the official App Store release.

The development team added my Apple ID to the pool of app testers. I accepted the subsequent invitation in my electronic mailbox, and promptly, the latest version of the app was available to me in TestFlight. One click on “Install”, and the test artifact was downloaded and installed on my iPad. From then on, TestFlight automatically notified me by push email whenever a new version was available for testing. Gone were the times when I had to look for a new build for installation on the shared drive every morning. One glance at my iPad, one click, and I was ready to go. The provision of the test artifact was much more convenient than I was used to from other projects.

Here we go!

The day of the first acceptance arrived, and I was very excited to get to work at last. I could not have been better prepared: The specified test cases were ready for execution, the iPad’s battery was fully charged, the latest app version was installed, and a soft drink was at hand. So let’s get going!

But what was that? I had only just executed the first test steps when something deviated from my test case. I had found a deviation from the acceptance criterion. Consequently, I created a bug from the test execution, clearly recorded all the steps for reproduction, and was going to add a screenshot for better visualization. And that was where I faced a problem: How do you get a screenshot of the iPad into the bug report?

On the PC, that was simple: Capture the screen, save it, and attach it to the ticket. But how do you create a screenshot on the iPad? And how do you send it to JIRA? Being an experienced iOS user, I quickly found a way to create a screenshot, and soon, I had it on my iPad. But then I had to think about how to transfer the screenshot. I considered the following options:

  • Send the screenshot to myself by email
  • Upload the screenshot to an online storage space and download it to the PC
  • Use the data cable and connect the iPad to the PC

I chose the data cable, and from then on, I diligently transferred my screenshots to JIRA.

With mobile testing, documenting bug reports (with screenshots) was different than with desktop or web applications. Back then, this meant that bug reporting was more arduous. Today, I work with a MacBook, and I can easily share and transfer screenshots of mobile terminals by means of Apple’s AirDrop.

I was able to complete the acceptance test without further deviations from the target state, and I was happy to see a lot of green test cases. The development team took the bug report into account in the next sprint. The screenshot that had been so difficult to document was much appreciated and helped correct the deviation. Thus, it was worth the effort.

Done!

It was easy for me to reach a conclusion after the first mobile acceptance test. Thanks to my previous project experience, and being trained in the art of software testing, I found my way around in the world of mobile testing quickly. There are always challenges when new technologies are being discovered—but that does not mean you have to reinvent the wheel. Tried and tested processes and methods can be used without difficulty. My affinity for mobile applications and devices certainly gave me an edge in exploring this new world, but I can only encourage every tester to get involved in this exciting field.

Today, I am no longer working on the acceptance side, but I have become an established member of the development team, and, in addition to the acceptance test of the stories, I am also responsible for the management of a variety of test devices and their various operating systems, test data management, and automated UI tests. I will tell you about the challenges in these fields in the next post.

QA Navigation Board – What do you mean, we have to test that?

In development projects, most clients primarily focus on thoughts of functionality and added value. Consequently, QA and testability are neglected in the planning stage. The team then encounters obstacles in the testing stage that can be avoided if the QA tasks are planned with some forethought. For the planning of the advanced testing stages, testers already have an adequate procedure: a detailed test concept that documents the test objectives and defines corresponding measures and a schedule.

aspects of the test strategy I topics of a test concept
Figure 1: aspects of the test strategy I topics of a test concept

However, this level of detail is not suitable for agile projects and development teams. Nevertheless, the team should consider most of the aspects that are specified in the test concept before starting a project. This is why we have developed a tool that enables the teams to take all the measures required for optimal testability in software projects into account. This tool covers the questions “What needs to be tested?” and “How and where do we want to test?”

To answer the first question, “What needs to be tested?”, in regard to software products, specifying the quality characteristics for the requirements to be fulfilled is decisive. The different quality characteristics are provided in ISO 25010 “Systems and software Quality Requirements and Evaluation (SQuaRE)” (Fig. 2).

Quality criteria according to ISO 25010
Figure 2: Quality criteria according to ISO 25010

Depending on how much the implemented requirements affect the quality characteristics, it is necessary to check these characteristics by means of a corresponding type of test. Apps with a high data throughput for example require efficiency tests, whereas web shops should be tested for compatibility in various browsers.

To facilitate the introduction of this topic to the teams, we use the QA Octant. The QA Octant contains the quality characteristics for software systems according to ISO 25010. These characteristics also point to the necessary types of tests that result from the set weighting of the different functional and non-functional characteristics (Fig. 3).

QA octant from the QA Navigation Board
Figure 3: The QA octant with weighted quality criteria

Thanks to the simple visualization and weighting of the different quality characteristics, the QA Octant can be used for planning. It allows product owners to keep track of the relevant requirements, and the team can classify the requirements according to the quality characteristics together with the product owner. Due to the weighting in the team, different opinions are more discernible, and the agreed classification can be clearly documented. The result then allows for the necessary types of tests to be deduced.

To answer the second question, “How and where do we want to test?”, the team would have to comb through the entire development process to find and document test and QA aspects. The development process can be different for every project, which could quickly make this issue highly complex (Fig. 4).

Development and QA process
Figure 4: Development and QA process

Again, to facilitate the introduction of this topic to the teams, we have developed the QA Map. The QA Map gives the team a practical tool to plan and document the measures required for optimal testability of the projects. The objective is to determine all QA-relevant issues for the teams and development projects, using a playful approach and at an early stage. All aspects of the test strategy, such as types of tests and tools, can be visualized, discussed and prioritized together in planning rounds. In addition to the planning, the QA Map with its eye-catching representation also serves as a reminder, or a quick introduction to the team’s test strategy.

Put together, the octant and the map form the QA Navigation Board, which can be put up as a picture on the wall (Fig. 5).

The QA navigation board (with octant and map) as a mural
Figure 5: The QA navigation board (with octant and map) as a mural

The QA Navigation Board provides a visual aid to the development teams, by means of which they can assess the planning aspects of quality assurance at an early stage. During the project term, the QA Navigation Board can also be used as a reference for the current procedure and as a basis for potential improvements.

Good luck testing!