With active Testautomatisierung, the number of test scripts often increases every day. Without structural specifications, it is easy to lose track, and thus lose the added value of test automation. The effort required to maintain unstructured test script that, in some instances, only the original author understands, should not be underestimated and can affect the progress of the entire project.
This is one of the reasons why Python was specified as the most suitable script language for test automation with Squish in the first part. For the testing, Python has few unnecessary characters and no complicated parentheses, making the test scripts easily readable even for employees without expert knowledge. Python uses indentation instead of brackets, with each indentation consisting of four spaces. This further improves the readability of the test code.
In medical engineering in particular, test script review are required from time to time, and have recently even become mandatory. Well-structured test scripts significantly reduce the time required for such reviews. A clearly structured test framework also has positive effects on the error analysis in testing. How do you structure your test scripts?
Our client found the following method to be effective: Firstly, test management is used to create a test case that can be executed manually, i.e. one that could be executed with the manually controlled mouse pointer on the AUT (“application under test”) in the respective test environment and without Squish. Secondly, the implementation of the test script begins. It is recommended, not only from the review perspective, to use the test case ID to name the test script (i.e. the test script “tst_1134” automates the test case with the ID 1134).
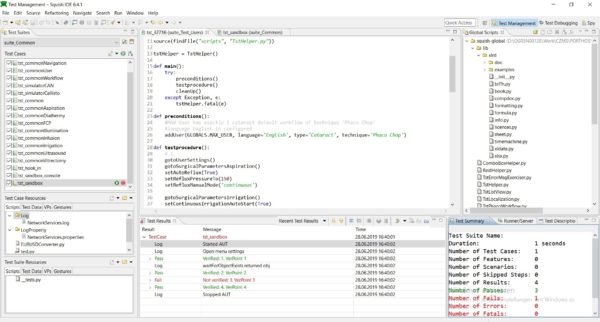
The test scripts themselves are based on a template with the following general structure:
    tstHelper = TstHelper()

    def main():
        try:
            preconditions()
            testprocedure()
            cleanUp()
        except Exception, e:
            tstHelper.fatal(e)

    def preconditions():
        'preconditions of the test case'

    def testprocedure():
        'test steps and expected results'

    def cleanUp():
        'return AUT to its original state'
As described in part 1, a single line at the beginning is enough to start the AUT or connect with the running process simply by instantiating an object of the TstHelper class. What is also worth noting is that all the preconditions and test steps are dealt with in a single “try…except” block. Any unexpected exception that must not occur during a clean test execution are intercepted in order to start individual error processing.
To prevent a faulty state of the AUT becoming the basis for subsequent tests, error processing should consist of terminating the AUT and cleaning up the test environment. This way, you can also avoid carrying the error forward and producing “false negative” test results in subsequent tests.
All the preconditions described in the manual test case have to be integrated into the “preconditions()” method. To keep maintainability at the highest possible level, a separate test script function should preferably be created for each precondition, and named in such a way that the name clearly reflects the functional content. The precondition “User A selected” for example becomes the test script function “selectUser(“User A”)”, “Menu for lighting configuration opened” becomes “gotoConfigMenuLight()”, etc.
The “testprocedure()” method is used analogously. It will later contain all the test steps and expected results. For a clearer structure, a brief comment can be added before each test step (e.g. “# 1.”). Here, too, a separate test script function should be written for each action in the test case if possible. The verification of the expected result, on the other hand, should not be included in the function, but separately and easily readable in the test script of the function. This makes a review much easier, and it also improves the maintainability of the scripts.
A 1:1 correspondence between test script function and test step is not always possible. Therefore, summarizing several functions in the test script into blocks and connecting them to the underlying test step by means of appropriate comments is admissible as well.
A great advantage of this approach is that the technical and functional level of testing are automatically separated. A library of test script functions is automatically created, and this library can then be used to create other test scripts. However, it is possible that the library also contains (technical) errors. Often, errors in the test execution are not found on the functional, but on the technical level. Wrongly implemented test script functions can easily lead to “false negative” or “false positive” test results.
To prevent this, a separate test suite should be created for the sole purpose of testing the library of test script functions by way of unit testing. Each test script function should be tested at least once for all possible input and output values. As far as possible, the tests should contain little domain-driven design, and basically always run successfully. The AUT itself is not tested in this context: it only serves as an appropriate test environment for the unit tests of the test script functions.
Furthermore, this test suite should preferably be run before the actual productive tests. If errors are identified, this has to result in the termination of the entire GUI test automation to prevent technical errors in the test script functions from generating “false negative” or “false positive” test results, which in turn would cause additional work for the error analysis (if they are found at all).
In summary, we can say that Python’s vast range of functions allows for almost any GUI test to be automated with Squish. Froglogic’s exceptional customer support is another great advantage. It was rare for the support team to take more than a day to answer a question. However, to make full use of the range of functions offered by Squish, basic programming skills are indispensable.