WCF Alternatives (Part 4) – Summary

In the last blog post of the series on alternatives for the Windows Communication Foundation (WCF), we are going to recapitulate and compare them once again. 

Decision matrix 

CharacteristicWeb APIgRPC
Bidirectional communication Possible with restrictions 
Has to be realized with SignalR. 
Possible with restrictions 
Only stream response is supported. 
Scope of changes to existing codeSmall 
Due to the adoption of the service methods into the controllers and the generation of the client, few adjustments are required. 
Large 
Mapping is required because specific data types are prescribed in some instances: An input parameter and a return value are required.
Necessary prior knowledge Technology-specific 
Web API knowledge about the use of controllers and actions, HTTP verbs 
Technology-specific 
Particularities of gRPC, creation of the *.proto file 
Platform independence Yes 
When you use .NET Core, client and server can run on different platforms. 
Yes 
When you use .NET Core, client and server can run on different platforms. 
InteroperabilityYes 
Client and server can be created using different programming languages. 
Yes 
Client and server can be created using different programming languages. 
Browser support YesOptional 
Currently possible only with third-party libraries 
Self-describing interfaces Optional 
OpenAPI is possible by integrating third-party libraries. 
No 
You have to create the *.proto file for the description of the interface yourself. 
Payload sizeHigher 
JSON, human-readable 
Lower 
Binary format 
SpeedLowerHigher
SustainabilityYes 
Microsoft currently recommends Web API as a sustainable alternative. 
Yes 
Microsoft currently recommends gRPC as a sustainable alternative. 
DebuggingEasily possible Possible with restrictions 
The transferred data cannot be examined due to the compression. 

Advantages and disadvantages 

Web API

gRPC

Advantages

  • Transmission data are readable 
  • Fewer code adjustments required for the migration 
  • More flexible design of the endpoints and calls with respect to input parameters and return values 
  • Faster transmission 
  • Typed by means of Protocol Buffers interface description 
  • Simple generation of client classes 

Disadvantages

  • Slower transmission compared to gRPC 
  • Generation of client classes only by means of third-party libraries 
  • Typing of the interface not possible 
  • Transmission data not readable 
  • Mapping code required because no standard .NET types are used 
  • Greater effort involved in the migration due to more necessary code adjustments 

Conclusion

In our blog post series on WCF, we have presented both ASP.NET Core Web API and gRPC. We have seen that both options have advantages and disadvantages. 

With Web API, the interfaces can easily be used by anybody due to the content-first approach and the use of HTTP. The transmitted data are accessible and can be read at any time. 

gRPC abstracts the interface calls using the contract-first approach, making them faster and very easy to address by developers. However, the transmitted data cannot be accessed. 

In principle, migration to both options is possible, and both are recommended by Microsoft. Still, we cannot definitively recommend one of the alternatives. The decision should always be project-specific and based on various criteria such as the project scope, experience with the respective technology or the existing architecture. 

WCF Alternatives (Part 3) – Instructions for the Migration from WCF to gRPC

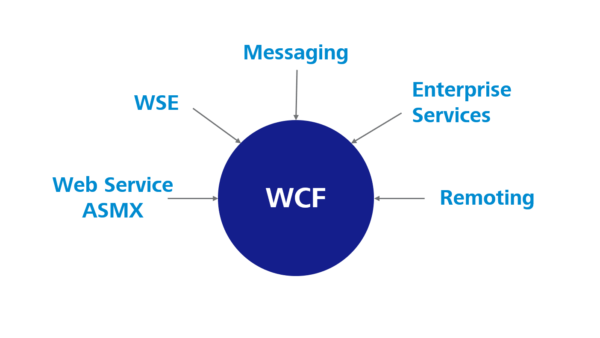
This blog post in the series on alternatives for the Windows Communication Foundation (WCF) describes the particularities and challenges regarding a WCF migration in preparation of the subsequent porting of the application to .NET Core.

The previous post described ASP.NET Core Web API as an alternative, and this article will address another option: gRPC. Again, we will describe a possible step-by-step procedure for the migration from WCF to gRPC.

Migration procedure

Usually, a separate WCF project is in the solution. As a direct conversion is not possible, this project can remain unchanged in the solution for the time being.

You should first create a new class library project for shared objects between the server and the client. Then copy the ServiceContract interfaces and the DataContract classes from the WCF project to this project, and remove the WCF-specific attributes such as “ServiceContract”, “OperationContract”, “DataContract”, “DataMember”, etc.

Client project

First of all, remove the WCF Service reference in the project that consumes the WCF Service. The WCF-specific attributes such as “CallbackBehavior” and the like can be removed as well.

Add a new reference to the previously created class library project for the shared objects. Next, you can create an empty implementation of the ServiceContract interface, which is now located in the class library project, in the client project. Now change the “old” initialization of the WCF Service to the, as-yet empty, implementation of the ServiceContract.

Lastly, you have to change the usings for the previously used DataContract classes from the WCF Service to the new class library project. It should now be possible to compile the client project again. In order to be able to start the project again, you have to remove the <system.serviceModel> element from the *.config.

Creating the interface description with Protocol Buffers

With gRPC, the interface is described in *.proto files using the Protocol Buffer language. The *.proto file should preferably be added to the newly created class library project. In order to be able to generate server and client classes from it later, you also have to add the “Google.Protobuf”, “Grpc.Core” and “Grpc.Tools” NuGet packages.

Once the *.proto file has been created, it has to be announced in the “ItemGroup” node in the *.csproj file by means of the following line.

<Project Sdk="Microsoft.NET.Sdk">
 
  <ItemGroup>
    <Protobuf Include="ProtoTimeService.proto" GrpcServices="Both" />
 
  </ItemGroup>
 
</Project>

Definition of *.proto in the *.config file


Structure of the *.proto file

Below is an example of how to transfer a WCF Service description into a *.proto file.

The [ServiceContract] attributes become “Service”, and [OperationContract] become “rpc” calls. The classes labeled [DataContract] become “message” objects.

[ServiceContract]
public interface IDataInputService
{
    [OperationContract]
    int CreateUser(User user);
 
    [OperationContract]
    int Login(User user);
 
    [OperationContract]
    List<Time> GetTimes(int userId);
 
    [OperationContract]
    void AddTime(Time time, int userId);
 
    [OperationContract]
    List<string> Projects();
}
 
[DataContract]
public class User
{
    [DataMember]
    public string Name { get; set; }
 
    [DataMember]
    public string Passwort { get; set; }
}
 
[DataContract]
public class Time
{
    [DataMember]
    public DateTime Start { get; set; }
 
    [DataMember]
    public DateTime End { get; set; }
 
    [DataMember]
    public string Project { get; set; }
 
    [DataMember]
    public int uId { get; set; }
 
    [DataMember]
    public int Id { get; set; }
}

Example of a WCF ServiceContract and DataContract to be migrated


syntax = "proto3";
 
import "google/protobuf/timestamp.proto";
import "google/protobuf/Empty.proto";
 
option csharp_namespace = "DataInputt.TimeService.Api";
 
service DataInputService {
    rpc CreateUser (UserDto) returns (UserResponse) {}
    rpc Login (UserDto) returns (UserResponse) {}
    rpc GetTimes (GetTimesRequest) returns (TimeCollection) {}
    rpc AddTime (AddTimeRequest) returns (google.protobuf.Empty) {}
    rpc Projects (google.protobuf.Empty) returns (ProjectCollection) {}
}
 
 
message UserDto {
    string name = 1;
    string passwort = 2;
}
 
message TimeDto {
    google.protobuf.Timestamp start = 1;
    google.protobuf.Timestamp end = 2;
    string project = 3;
    int32 uid = 4;
    int32 id = 5;
}
 
message UserResponse {
    int32 id = 1;
}
 
message GetTimesRequest {
    int32 userId = 1;
}
 
message TimeCollection {
    repeated TimeDto times = 1;
}
 
message AddTimeRequest {
    TimeDto time = 1;
    int32 userId = 2;
}
 
message ProjectCollection {
    repeated string projects = 1;
}

Example of the created gRPC *.proto file


When you create the *.proto file, you should observe the following points.

Indicate the namespace

To ensure that the generated server and client implementation is given the correct namespace, it should be indicated in the *.proto file.

Definition of input parameters / return values

gRPC interfaces only allow for calls with a single parameter. If you work with several input parameters in the WCF Service, they have to be combined into a new message object.

Every call of a gRPC interface needs a return value as well. If there were void methods in the WCF Service, they have to return the specific “google.protobuf.Empty” type in gRPC now.

Furthermore, using a single primitive data type (int, bool, string) for the input and return is not allowed. If only an int or string is to be used for the return value, another message object has to be created for this purpose.

If methods call up one another in the WCF Service, this was very simple if a primitive data type was used. If you want this to be possible in the gRPC interface as well, you have to ensure that the respective methods use the same message objects. This way, you can avoid unnecessary mapping.

Names of the message objects

When you name the message objects, you should not use the exact same names as the DataContract classes of the WCF Service. This is important because some of the C# classes that will later be generated from the definition use different data types and need to be mapped before they can be used. In order to distinguish them more clearly from the DataContract classes, it is advisable to use distinctive names.

Furthermore, the properties within the message objects have to be numbered sequentially.

Data types in message objects

C# classes are automatically generated from the message objects of the *.proto file. You should be aware that the standard C# data types are not always used for the generation.

For example, the google.protobuf.Timestamp type specified in the *.proto file becomes the Google.Protobuf.WellKnownTypes.Timestamp type in the C# class and has to be converted into a DateTime first whenever it is to be used.

If the *.proto file contains “repeated”, this does not become a List<T>, but a Google.Protobuf.Collections.RepeatedField<T>, which needs to be mapped accordingly as well.

Other types such as Dictionary<K, V> also have different types in the *.proto file and the C# class generated later. The C# type “decimal” is currently not supported by the *.proto file at all because of insufficient rounding accuracy. As a workaround, creating your own decimal message object that specifies the pre-decimal and the decimal places as separate int values is recommended.

Creating the gRPC server project

The gRPC server project can be created as a simple console application, and it should contain a reference to the previously newly created class library project with the *.proto file.

To start the server, you only need a few lines of code:

static void Main(string[] args)
{
    const int port = 9000;
    const string host = "0.0.0.0";

    Grpc.Core.Server server = new Grpc.Core.Server
    {
        Services = { DataInputt.TimeService.Api.TimeService.BindService(new TimeService()) },
        Ports = { new Grpc.Core.ServerPort(host, port, Grpc.Core.ServerCredentials.Insecure) }
    };
    server.Start();

    Console.WriteLine($"Starting server {host}:{port}");
    Console.WriteLine("Press any key to stop...");
    Console.ReadKey();
}

Example for starting a gRPC server


You only have to define the host and port and assign an implementation to the service generated with the *.proto file in the class library project. The implementation should be located in the gRPC server project.

Implementation of the gRPC service

The gRPC service is implemented by way of the inheritance of the ServiceBase generated with the *.proto file in the class library project. The individual service calls can then be implemented by means of an override.

public class TimeService : DataInputt.TimeService.Api.TimeService.TimeServiceBase
{
    public override Task<UserResponse> CreateUser(UserDto request, ServerCallContext context)
    {
         
    }
 
    public override Task<UserResponse> Login(UserDto request, ServerCallContext context)
    {
         
    }
 
    public override Task<TimeCollection> GetTimes(GetTimesRequest request, ServerCallContext context)
    {
         
    }
 
    public override Task<Empty> AddTime(AddTimeRequest request, ServerCallContext context)
    {
         
    }
 
    public override Task<ProjectCollection> Projects(Empty request, ServerCallContext context)
    {
         
    }   
}

Example of the server implementation of a gRPC service


If the service implementation uses the “old” WCF code, it may be necessary to map the parameters if the data types do not match the “old” DataContract classes.

Furthermore, it is important to know that the lifecycle of the service implementation extends over the entire runtime of the gRPC service (singleton). Contrary to a Web API Controller, gRPC does not create a new instance of the service implementation for each request. Consequently, the state of the gRPC service is preserved between the calls. Therefore, class variables and resources created in the constructor or injected should preferably be avoided because it may not be possible to secure their state in between calls.

Implementation of the gRPC client

You can use the empty implementation of the ServiceContract interface created in the consuming project for the implementation of the gRPC client. First, you have to establish a connection to the gRPC server.

const int port = 9000;
string host = Environment.MachineName;
 
var channel = new Channel(host, port, ChannelCredentials.Insecure);
var grpcClient = new TimeService.Api.TimeService.TimeServiceClient(channel);

Example of a client for establishing the connection to the gRPC server


Again, a client class generated with the *.proto file in the class library project is used for this purpose. It provides the calls defined in the *.proto file.

Now the corresponding calls of the gRPC client class have to be added to the empty implementation of the ServiceContract interface. It may be necessary to map the input parameters and return values used by the gRPC service to the previous DataContract classes.

Because of the use and implementation of the “old” WCF Service interface, there is no need to adjust or change anything else in the consuming project.

Bidirectional communication

The concept of bidirectional communication in gRPC is very different from WCF Duplex Services.

With WCF, the server can easily call up various methods on the client side via callback interfaces. With gRPC, on the other hand, a server method is called by the client, which then returns data to the client by way of a stream.

For this purpose, the gRPC server method has to be implemented in such a way that it is not terminated, maintaining the connection. The transmission of data to the client can then be triggered e.g. by events.

After calling the server method, the client also has to maintain the connection and respond to the receipt of new data.

Consequently, the conversion to gRPC streaming requires some very fundamental, conceptual adjustments.

Cross-cutting concerns such as authentication, authorization, logging and error handling of the gRPC calls have not been considered. These issues should be checked and adjusted as required in each individual case.

Conclusion

Compared to ASP.NET Core Web API, the conversion from WCF to gRPC requires much more work and more adjustments in the code. Firstly, you have to create a *.proto file. Because of the requirement that each service call must have a return value and that only a single input parameter is permitted, some adjustments of the method signatures are necessary. As some of the generated classes do not use .NET standard types, each server and client method has to be completed with the respective mapping code.

Furthermore, when you use gRPC, it is imperative to know that the lifecycle of the service instance extends over the entire runtime of the gRPC server (singleton).

WCF Alternatives (Part 1) – Introduction

The Windows Communication Foundation (WCF) is a communication platform for the creation of distributed applications developed by Microsoft for the .NET Framework. It was introduced with the .NET Framework 3.0 in 2006, replacing .NET Remoting. With WCF, the various aspects of distributed communications are logically separated, and different communication technologies are combined into a standardized programming interface. This makes it possible to focus on the business logic without having to deal with the connection of the different communication technologies.

The structure of WCF

The following communication technologies were unified with the release of WCF.

WCF alternatives
Figure 1: Unified communication technologies

The structure of a WCF application is based on three questions (where, how, what).

The first question, “Where”, describes the address at which the application can be found in order to communicate with it, e. g.:

  • http://localhost:81/DataInputService
  • net.tcp://localhost:82/TcpDataInputService
  • net.pipe://localhost/PipeDataInputService
  • net.msmq://localhost/MsMqDataInputService

The second question, “How”, describes which protocols and which encoding, the so-called bindings, are to be used for the communication. They are defined in the *.config of the application, allowing them to be modified at any time without the need to recreate the application. WCF supports nine different bindings:

  • Basic Binding (BasicHttpBinding)
  • TCP Binding (NetTcpBinding)
  • Peer Network Binding (NetPeerTcpBinding)
  • IPC Binding (NetNamedPipeBinding)
  • Web Service Binding (WSHttpBinding)
  • Federated WS Binding (WSFederationHttpBinding)
  • Duplex WS Binding (WSDualHttpBinding)
  • MSMQ Binding (NetMsmqBinding)
  • MSMQ Integration Binding (MsmqIntegrationBinding)  

The last question, “What”, uses various contracts to define the endpoints and data types to be provided. The endpoints are defined by ServiceContracts, and the data types by DataContracts.

Example of a WCF ServiceContract and DataContract:

[ServiceContract]
public interface IDataInputService
{
    [OperationContract]
    int CreateUser(User user);
 
    [OperationContract]
    int Login(User user);
 
    [OperationContract]
    List<Time> GetTimes(int userId);
 
    [OperationContract]
    void AddTime(Time time, int userId);
 
    [OperationContract]
    List<string> Projects();
}
 
[DataContract]
public class User
{
    [DataMember]
    public string Name { get; set; }
 
    [DataMember]
    public string Passwort { get; set; }
}
 
[DataContract]
public class Time
{
    [DataMember]
    public DateTime Start { get; set; }
 
    [DataMember]
    public DateTime End { get; set; }
 
    [DataMember]
    public string Project { get; set; }
 
    [DataMember]
    public int uId { get; set; }
 
    [DataMember]
    public int Id { get; set; }
}

WCF is very popular because of its flexibility achieved with the separation and its versatility, which is why the platform is readily used in numerous projects.

Why is a migration necessary?

When .NET Core was first announced in 2016, WCF was already no longer included. WCF is not part of the subsequent .NET Core releases, including the most recent .NET 5.0.

For Microsoft, the “W” in WCF, which stands for Windows, would probably be the greatest issue in porting. In order to do justice to .NET Core, a cross-platform solution would have to be found for this purpose. One of the problems in this context are the Windows-specific operating system libraries currently used, e.g. for Socket Layers or cryptography.

Even though the developer community is asking for the integration of WCF in .NET Core, it is unlikely that Microsoft will provide this in the foreseeable future.

The future with gRPC and Web API

To make an existing project sustainable, or generally use the advantages of .NET Core, porting to .NET Core should be the aim. This is particularly useful for projects that are being actively and continuously developed. If WCF is used in a project, this poses an additional challenge in porting. First, an alternative needs to be found, and then a preparatory transition of WCF is required. Microsoft generally recommends two alternatives, gRPC and Web API, to replace WCF.

We are going to present these two alternatives in a series of blog posts, discussing the respective particularities and challenges of the migration. More articles will follow shortly.

Look Me in the Eyes – Application Monitoring with Azure Application Insights

With Application Insights, Microsoft provides an application monitoring service for development and DevOps. It can log virtually everything, from response times and rates to errors and exceptions, page impressions, users and user sessions, the back end, and desktop applications.

Monitoring is not restricted to websites, either. Application Insights can also be used with web services and in the back end. It can even monitor desktop applications. The data can then be analyzed and interpreted in various ways (see Figure 1).

Figure 1: Possible applications of Application Insights (Source: https://docs.microsoft.com/en-us/azure/azure-monitor/app/app-insights-overview)

Logging

As a starting point, you need an Azure subscription with an Application Insights instance. Once the latter has been set up, you will find the so-called Instrumentation Key in the overview, which functions as a connection string.

As soon as the instance has been provided, you can immediately start the implementation. In terms of programming, you are in no way limited to Azure resources or .Net. Microsoft supports a wide variety of languages and platforms.

We will use a small .Net Core console application as an example. All you have to do is integrate the NuGet package Microsoft.Applicationlnsights, and you can get started.

First, you create a Telemetry Client. Simply insert the corresponding Instrumentation Key from your own Application Insights instance, and just like that, the application is ready for the first log entries.

  • Trace generates a simple trace log entry with a corresponding message and appropriate severity level.
  • Events are appropriate for structured logs that can contain both text and numerical values.

Metrics, on the other hand, are numerical values only, and therefore used mainly to log periodic events.

  • Trace generates a simple trace log entry with a corresponding message and appropriate severity level.
  • Events are appropriate for structured logs that can contain both text and numerical values.
  • Metrics, on the other hand, are numerical values only, and therefore used mainly to log periodic events.
static void Main(string[] args)
{
Console.WriteLine("Schau mir in die Augen");

       var config = TelemetryConfiguration.CreateDefault();
       config.InstrumentationKey = "INSTRUMENTATIONKEY";
       var tc = new TelemetryClient(config);

       // Track traces
       tc.TrackTrace("BlogTrace", SeverityLevel.Information);

       // Track custom events
       var et = new EventTelemetry();
       et.Name = "BlogEvent";
       et.Properties.Add("Source", "console");
       et.Properties.Add("Context", "Schau mir in die Augen");
       tc.TrackEvent(et);

       // Track custom metric
       var mt = new MetricTelemetry();
       mt.Name = "BlogMetric";
       mt.Sum = new Random().Next(1,100);
       tc.TrackMetric(mt);

       tc.Flush();
}

As a side note, keep in mind that log entries appear in Application Insights with a delay of up to five minutes.

Interaction with NLog

Application Insights can also be integrated into an existing NLog configuration in a few simple steps.

You have to install the NuGet package Microsoft.Applicationlnsights.NLogTarget, and then add the following entries to the NLog configuration:

  • Add Extensions with reference to the Application Insights Assembly
  • New target of the Application Insights Target type (again specifying your own instrumentation key)
  • New rule targeting the Application Insights Target
<nlog xmlns="http://www.nlog-project.org/schemas/NLog.xsd"
      xmlns:xsi="http://www.w3.org/2001/XMLSchema-instance"
      throwConfigExceptions="true">

  <extensions>
    <add assembly="Microsoft.ApplicationInsights.NLogTarget" />
  </extensions>

  <targets>
    <target name="logfile" xsi:type="File" fileName="log.txt" />
    <target name="logconsole" xsi:type="Console" />
    <target xsi:type="ApplicationInsightsTarget" name="aiTarget">
      <instrumentationKey>INSTRUMENTATIONKEY</instrumentationKey>
      <contextproperty name="threadid" layout="${threadid}" />
    </target>
  </targets>

  <rules>
    <logger name="*" minlevel="Info" writeTo="logconsole" />
    <logger name="*" minlevel="Debug" writeTo="logfile" />
    <logger name="*" minlevel="Trace" writeTo="aiTarget" />
  </rules>
</nlog>

Analysis

The data are then analyzed by means of the Application Insights portal. All the logs can subsequently be found in the respective table under Logs (see Figure 2).

Figure 2: Analyses with Application Insights

The trace logs created in the console application can be found in the traces table. Queries are phrased using the Kusto Query Language (KQL). The traces from the example above can be requested using the following query:

traces
| where message contains "BlogTrace"

The logged metrics can also be represented as a line chart using the following query (see Figure 3):

customMetrics
| where timestamp >= ago(12h)
| where name contains "Blog"
| render timechart 
Grafische Darstellung der geloggten Metriken
Figure 3: Graphic representation of the logged metrics

Dashboards & alert rules

To identify irregularities at an early stage, you can create customized dashboards and alert rules. In the case of the metrics used above, you can pin the chart to an enabled dashboard. This can be continued with additional queries as desired until all the required information is compiled in an overview.

The following dashboard shows the metric of the console application. It also contains examples of information regarding server requests, incorrect queries, response times, and performance and availability (see Figure 4).

Figure 4: Information on the dashboard at a glance

If an anomaly occurs at a time when you do not have an eye on the dashboard, it is also possible to be alerted immediately by email or text message by means of alert rules.

Individual alert rules can be created and managed in the Warnings menu in the Application Insights portal. An alert rule consists of a signal logic (condition) and an action group.

For the condition, you select a signal, e.g. a metric, and define a threshold: “traces greater than 80”. If you get more than 80 trace entries during a defined period of time, the alert is triggered.

The action group defines precisely what is to be done in the case of an alert. Here, you can have simple notices sent to specified persons by email or text message, or program more complex actions by means of runbooks, Azure Functions, logic apps or webhooks (see Figure 5).

Figure 5: Various types of action in an action group

REST API

If it is necessary for the data to be processed outside of Application Insights as well, they can be requested by means of a REST API.

The URL for API requests consists of a basic part and the required operation. Operations are metrics, events or query. In addition, an API key has to be submitted as “X-API-Key” HTTP header:

https://api.applicationinsights.io/v1/apps/{app-id}/{operation}/[path]?[parameters]

The app ID can be found in the settings under API Access.

Abbildung 6: URL der API-Aufrufe
Figure 6: URL for API requests (Source: https://dev.applicationinsights.io/quickstart)

Continuing with the metrics described above, this is the API request with a query operation for the total number of entries during the last 24 hours:

https://api.applicationinsights.io/v1/apps/{}app-id}/query?query=customMetrics | where timestamp >= ago(24h) | where name contains “Blog” | summarize count()

ago(24h) | where name contains “Blog” | summarize count()

The result is returned in JSON format:

{
    "tables": [
        {
            "name": "PrimaryResult",
            "columns": [
                {
                    "name": "count_",
                    "type": "long"
                }
            ],
            "rows": [
                [
                    13
                ]
            ]
        }
    ]
}

Conclusion

As this example shows, centralized logging can easily be set up and managed by means of Application Insights. In addition to the quick and simple integration, the automated infrastructure is an advantage. No need to deal with the hosting, and if the load increases, Application Insights scales automatically.

Building .NET Core Applications

Preamble

.NET Core is still a new technology and people might ask themselves questions like “how applicable is it in a real- life scenario?”, “how convenient is it to set up?”, “what do I need to configure, to get a build-pipeline up and ready?”, “do I need any tools aside from the official .NET Core SDK?” … therefore I want to share my gained experience while setting up and configuring a “Microsoft-friendly” build- controller and agent scenario. It is based on the regular Microsoft technologies including Team Foundation Server 2017 and Microsoft Windows VSTS build agent, both hosted on Microsoft Windows Server 2016.

Prerequisites

Build controller
• TFS 2017
Build agent
• VSTS-Agent win-7-x64-2.112.0
• .NET Core SDK 1.0.3 for Windows

Although it is not the cheapest way to implement a .NET Core build pipeline, it is also not the most expensive one, since we are not installing any Visual Studio stuff inside the build agent. And yes you arguably could host a vsts build agent inside a linux for example but that setup will be mentioned in a seperate blogpost. Alright lets not go any further into licence and pricing discussions and jump right to the technology part.

Set-Up

First of all you need to establish a controller-agent connection so all the neat build data is captured and processed correctly. There are 4 different ways how you can do it which are explained here:
See http://go.microsoft.com/fwlink/?LinkID=825113 for more detailed information.

After you are done with that, connect to Build-Agent-Host via remote desktop and download/install the .NET Core SDK.
See https://go.microsoft.com/fwlink/?linkid=847097 for more detailed Information.

Make sure that the dotnet.exe path is added to the PATH environment variable and you can call it from the cmd/powershell.
At this point you are pretty much done with your build agent configuration and you can jump right into your TFS source controlled .NET Core project and add a default .NET Core build definition.

Build configuration

If you are using the ASP.NET Core (Preview) build template to add a build definition, then you should follow these steps below.

After you added the build definition modify the single tasks according to your project root structure as it is shown below. Keep in mind that all the commands are seperate tools which are composed inside the .NET Core CLI Toolchain.

The restore command is mapped to the integrated NuGet, we use the verbosity flag to display the „used nuget feeds“ information.

The build command is mapped to integrated msbuild. The $(BuildConfiguration) variable gets replaced before the actual target gets executed on the build agent. It should either be replaced by „Debug“ or „Release“.

The test command is mapped to vstest.console or to xunit.console depending on your configuration.

Notice that the test command requires an extra logger parameter in case you want to capture and print test for publishing reasons. Now you need to add the „Publish Test Results“ step and configure the path wildcards/naming in a way that it grabs the results.xml file produced by your vstest.console logger.

After you queued up and finished your build you should get a report which should look similar to the one below.

Conclusion

So at the current .NET Core SDK and TFS state, there are still minor configurations required to get your pipeline going. Regardless, the installation effort is very minimal and intuitiv in my opinion and the alternative to host a .NET application on a Linux OS instead of Windows should make a ton of people happy! So give it a try ????.

Building .NET Core Applications and enjoy it!