The rapid development in the world of web technologies, especially in SPA frameworks like Angular and React, empowers developers to build enterprise scale, platform independent applications with a flexible and vivid technology stack. Although these applications can fulfill numerous use cases they may fall short in others because of the limitations web applications have. Especially the limited environment integration and system access capabilities make some kinds of applications impossible (e.g. missing file system access) or hurt the user experience (e.g. no offline usage, no integration into application menu or task bar in most cases).
The Electron Framework by GitHub attempts to tackle those problems while preserving the advantages of web technologies by wrapping conventional web apps as native applications and giving them powerful access to the underlying system and their environment.
In this article we will go over the process of building a hybrid Desktop App with Angular using the Angular-CLI and Electron.
About Electron
Electron is an open source framework developed by GitHub for the Atom project. It integrates web technology based applications into the system, to make them work like native applications. To do so, it uses the rendering component of the Chromium browser to render the web views, while executing the JavaScript elements of the app in the Node.js runtime environment to provide access to the underlying system. In addition Electron brings additional APIs to integrate the application into the environment (e.g. with keyboard listeners, notifications, tray integration, etc.) it runs in.
Creating an Electron application
To run a web app in Electron, you need to provide an entry point script to the electron binary (which is available as binary package or as NPM module). You can find an example of an entry point script at the Electron quick start repo. The entry point (which is run in the Main Process) can register global handlers for the app (e.g. keyboard shortcuts, behavior on closing, etc.) and creates one or multiple windows for the app via
    const {app, BrowserWindow} = require('electron')
    const path = require('path')
    const url = require('url')
    // Create the browser window.
    win = new BrowserWindow({width: 800, height: 600})
    // and load the index.html of the app.
    win.loadURL(url.format({
      pathname: path.join(__dirname, 'index.html'),
      protocol: 'file:',
      slashes: true
    }))
Each of the windows runs the specified web page (index.html in this example) and the associated JavaScript in a Render Process. All the JavaScript in this Render Process has access to the full Node.js API and all available NPM packages, to the DOM, which is visually represented by the Chromium renderer of this process, as well as to parts of the Electron API.
You can pass an entry point script to Electron either via the command line arguments of the Electron binary (e.g. electron ./index.js) or you pass a directory containing an package.jsonto the Electron command (e.g. electron ./project/). In the latter case electron executes the file referenced by the mainfield of the package.json.
Building desktop apps with Angular
Because Electron doesn’t constrain the used web technology stack, it’s possible to use Angular to create an Electron Desktop App. To spin up your project, you can use this project seed and all configuration changes, which we will perform during this article are available in this Gist.
For the purpose of this article we will build a Hello World app with Angular and Electron to demonstrate the setup of such a project. You can find the resulting application in this GitHub repository. The commit which corresponds to the upcomming changes will be linked on top of every section.
We will use the Angular-CLI which is a tool for generating Angular Projects without having to bother with the configuration and selection of all necessary and fast evolving tools and best practices in the Web ecosystem. In addition to the setup off linting, building, bundling and testing tools it brings some neat little features like code scaffolding or a development server.
Setting up the project
Commit: f661853
In this project we will use Yarn as an alternative to npm for installing and managing our dependencies. If you have not made the transition to Yarn yet you can use this guide for the migration. If you do not want to switch that’s no problem either, you just have to use the equivalent npm commands.
Let’s start by setting up a new mostly configured project with the new command of the Angular-CLI. So install the Angular-CLI on your system with
yarn global add @angular/cliAlthough the Angular-CLI already switched to Yarn internally, it still sets up your projects via npm. If you do not want this you can configure the CLI to use Yarn by running
ng set --global packageManager=yarnThen you can run
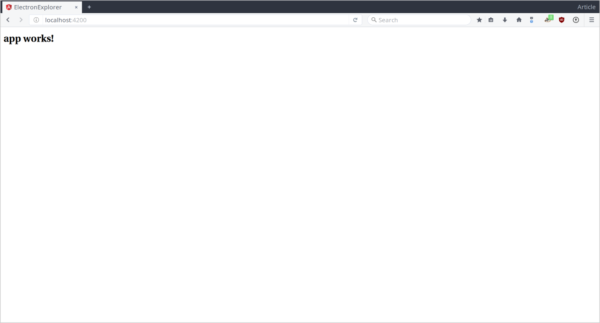
ng new hello-electronThis creates a new Angular Project named hello-electron, which is already preconfigured as a web project. The installation of the project dependencies causes the yarn.lock file, which pins your projects dependencies. Commit this file to keep track of your dependencies correctly. To test if there were any issues while setting up the base project, you can run the default application. To do so, run ng serve and head your browser to the location which is printed in the terminal (normally this is http://localhost:4200). You should see the Text “App works!“
Because the Angular-CLI isn’t aware of the possibility of building Electron Desktop Apps (yet) neither the build will work out of the box nor the build results will run in Electron. To achieve this, we need to reconfigure some parts of the setup.
Ejecting the project
Commit: 48da720
Angular-CLI brings a lot of tools for managing, building and supporting our project. The configuration and invocation of these tools is managed internally and automatically by the CLI and is accessed via the corresponding CLI commands. While this is very convenient it limits our influence on the build and tooling, especially if we want to achieve more exotic effects, which are out of the scope of the Angular-CLI. Because we want to make a lot of changes to the projects configuration during this article, we have to “eject” the project from the Angular-CLI. This means that all build and tool configuration files get generated and added to our project. After this some of the CLI commands (like build or serve) no longer work and get substituted by mostly equivalent Yarn / NPM scripts.
To eject the Project run
ng ejectand install some new and some missing dependencies via
    yarn install
    yarn add --dev webpack html-webpack-plugin extract-text-webpack-plugin postcss-url @ngtools/webpack
Installing Electron
Commit: 54800ba
To use electron (and the corresponding TypeScript typings), we install it locally into our project for development purposes to set a working version and list it in our dev-dependencies:
yarn add --dev electron @types/electronAdapting entry point web page
Commit: a16854d
The file src/index.html is the entry point for our Angular application. We need to adapt the base tag from
    <!doctype html>
    <html>
      <head>
        [...]
        <base href="/">
        [...]
      </head>
      [...]
    </html>
to
    <!doctype html>
    <html>
      <head>
        [...]
        <base href="./">
        [...]
      </head>
      [...]
    </html>
because Electron doesn’t resolve included files relatively to the current domain (like web browsers do), but relatively to the current file tree, so the base / would resolve relatively to the file system root. We want the dependencies to get resolved relatively to the location of index.html, so we use ./.
Setting the correct polyfills
Commit: dff6c21
The file src/polyfills.ts includes some polyfills into the project. The Polyfill zone.js, which is necessary to detect asynchronous code execution to trigger the Angular change detection correctly by implementing a concept named “Zones” doesn’t work by default with Node.js, which is used for some parts of the Code execution in Electron. To make the change detection work with Node.js, a different version of the zone.js polyfill called zone-node exists. To enable the correct change detection for Node.js as well for ordinary Angular Code we have to include the zone-mix polyfill. To do so, we have to change the line
    [...]
    import 'zone.js/dist/zone';
    [...]
to
    [...]
    import 'zone.js/dist/zone-mix';
    [...]
in src/polyfills.ts.
Adapting the Webpack configuration
Commit: ae3cc50
The Angular-CLI uses Webpack to handle the project build, the development server and particularly the module bundling. (Theoretically we don’t need module bundling when using Electron, because Node.js has native support for modules, but because Webpack handles so much different things of our projects infrastructure, it is easier to configure Webpack for Electron and bundle our project, than it is to rebuild all the infrastructure ourselves.)
To set up Webpack for our build open the webpack.config.js file and modify the returned Object in the following way:
    [...]
    module.exports = {
      // inserted line
      "target": "electron-renderer",
      [...]
      // modified entry
      "node": {
        "fs": false,
        "global": false,
        "crypto": false,
        "tls": false,
        "net": false,
        "process": false,
        "module": false,
        "clearImmediate": false,
        "setImmediate": false,
        "Buffer": false,
        "__filename": false,
        "__dirname": false
      }
    };
This configures Webpack not to build for a Web environment but for an Electron rendering Process and to leave all references to Node core modules untouched. Basically this allows you to include Node.js core modules as well as using browser and Electron specific APIs (like the DOM) in your application (read more about different targets in the Webpack documentation).
We also want our Electron entry point script (which we will add to the project shortly) to be automatically copied from our project sources to our build result.
We can achieve this with Webpack by installing the copy-webpack-plugin into our project viayarn add --dev copy-webpack-plugin
Now we can use it by including it in our webpack.config.js:
    const CopyWebpackPlugin = require('copy-webpack-plugin');
    [...]
    module.exports = {
      [...]
      plugins: [
        [...]
        // inserted lines
        new CopyWebpackPlugin([{
          context: path.resolve(__dirname, "src"),
          from: "entry.js"
        }]),
        [...]
      ],
      [...]
    }
This copies the file entry.js from our source folder to the root of our build result.
Fixing the TypeScript configuration
Commit: a775a79
Because of a bug in the TypeScript loader used by the build the type root isn’t resolved correctly by default. To fix this set the type roots explicitly in the TypeScript configuration files src/tsconfig.app.json, src/tsconfig.app.json and e2e/tsconfig.e2e.json and add the entry "node" to the types array:
    {
      "compilerOptions": {
        [...]
        "typeRoots": [
            "../node_modules/@types"
        ],
        types: [
          "node",
          [...]
        ],
        [...]
      },
      [...]
    }
Adapting unit test configuration
Commit: 9c4c3e4
Easy and integrated unit testing is another major feature of the Angular-CLI, which does not run out of the box, when using Electron as environment. All tests, which involve features of the Node.js environment fail, because they are not available in the normal Browser, which the preconfigured test runner uses to run the tests in. To run our unit test, we have to configure the test runner, to run our tests in Electron, too.
To do so, install the Electron launcher for the Karma test runner via
yarn add --dev karma-electronThen open the file karma.conf.js and perform the following modifications:
    [...]
    module.exports = function (config) {
      config.set({
        [...]
        plugins: [
          require('karma-jasmine'),
          // modified line, previously: require('karma-chrome-launcher')
          require('karma-electron'),
          [...]
        ],
        [...]
        client: {
          // inserted line
          useIframe: false,
          [...]
        },
        [...]
        // modified line
        browsers: ['Electron'],
        [...]
      });
    };
This configures Karma to use Electron and execute every test in a new Browser (Electron) window, instead of in an iFrame in the same window. This is necessary, because iFrames in Electron have no access to the Node.js environment, while windows have.
With these changes we have set up the provided unit testing for our Angular-Electron app and can run the test via yarn run test.
Configure End-To-End testing
Commit: cf0451a
The Angular-CLI also brings a setup for End-To-End (aka. e2e, aka. UI-Testing) which can easily be configured to use Electron as execution environment instead of Google Chrome because it can provide the same webdriver interface as Chrome. To configure the e2e testing framework (called Protractor) open the file protractor.conf.js and adapt it the following way:
    [...]
    exports.config = {
      [...]
      capabilities: {
        // inserted lines
        chromeOptions: {
          binary: './node_modules/electron/dist/electron',
          args: ['--test-type=webdriver']
        },
        'browserName': 'chrome'
      },
      [...]
    };
Now Protractor uses Electron instead of Chrome and all your tests will work, even when they use Node.js features. Be aware, that the End-To-End testing setup of the Angular-CLI requires a running dev server, which we will configure in the next section.
Adapting the package configuration
Commit: e426edd
To optimize our workflow I highly recommend setting some properties and scripts in our projects package.json.
To make Electron behave correctly, when initialized in the projects root directory, set the main field of the package.json:
    {
      [...]
      "main": "dist/entry.js",
      [...]
    }
dist/entry.js will be the location of our Electron entrypoint in the build result.
To run our app, we add the run script, which invokes Electron in our package directory:
"run": "electron .",So running yarn run run will launch our Electron app.
Now we have a project setup, which will allow us to build, test and run our app, but the Angular-CLI provides another very neat feature called LiveReload. LiveReload spins up a webserver via the Webpack dev server, which serves our app wrapped in some more JavaScript, that reloads our app automatically from the server when it changes, while our sources get recompiled every time they are modified. This makes it possible to develop our app while constantly seeing the current state and without having to compile and run it by hand every time we make a change. Because we use Electron instead of a browser and we want to build desktop apps, we load our app directly from the build result and have no connection to the LiveReload server by default. To use this feature, we have to crate a second, slightly modified Electron entry point for development purposes and load this one to use LiveReload. We now create an additional NPM script, which concurrently starts the dev server and our Electron binary with our “live” entry point (which we will create later). To do so, we use the tool concurrently, which we install with
yarn add --dev concurrentlyThen we modify the following script in our package.json:
"start": "concurrently \"webpack-dev-server --port=4200\" \"electron src/entry.live.js\"",Creating the entry points
Commit: c5ccedf
To load our App into Electron, we need to create an entry point at src/entry.js, whose main purpose is to load the entry point HTML document (which is generated in the build process). We use this slightly modified version of the example entry point from the Electron documentation. Basically the entry point loads the file index.html in the same directory as the entry point itself into a new window by calling
    win.loadURL(url.format({
      pathname: path.join(__dirname, 'index.html'),
      protocol: 'file:',
      slashes: true
    }))
It also handles general application lifecycle events like application start or exit and registers environment integration like keyboard bindings or tray icons.
A small modification opens the developer tools, when the app is started with the environment variable NODE_ENV=development set.
To make use of LiveReloading, we also need the alternative entry point src/entry.live.js which you can find here. This entry point is mostly the same as src/entry.js. The only difference is, that the application entry point page gets loaded from the dev server instead of the file system. By default the dev server serves at http://localhost:4200, so we change the lines
    [...]
    function createWindow () {
      [...]
      win.loadURL(url.format({
        pathname: path.join(__dirname, 'index.html'),
        protocol: 'file:',
        slashes: true
      }))
      [...]
    }
    [...]
to
    [...]
    function createWindow () {
      [...]
      win.loadURL(url.format({
        pathname: 'localhost:4200',
        protocol: 'http:',
        slashes: true
      }))
      [...]
    }
    [...]
We also want to set a short timeout, so we reduce the chance of loading the file from the server, before the server has finished building (you may adapt the time according to your project size and the resulting build time). To do so, we change the createWindow function:
    [...]
    function createWindow () {
      // content
      [...]
    }
    [...]
to
    [...]
    function createWindow () {
      setTimeout(() => {
        // content
        [...]
      }, 12000)
    }
    [...]
Because the dev server only serves the static files and handles the changes, it is not relevant, if the code inside the application bundle is written for the browser or for Electron and Electron executes any provided code in the bundle, whether it is generated by your sources or by the dev server. So the page gets loaded and reloads itself, when the dev server recognizes changes.
Adding Devtron
Commit: 0832c1b
Devtron is an extension for the Electron DevTools, which helps you developing your app by giving you more information about Electron internals, like the Inter-Process-Communication (IPC) mechanism or the established event listeners. Just install it to the project via
yarn add --dev devtronand install it to the DevTools right after opening them, when the app is started in development mode, by modifying the following section in entry.js and entry.live.js:
    [...]
    function createWindow () {
      [...]
      // Open the DevTools when in dev mode.
      if(process.env.NODE_ENV=='development') {
        win.webContents.openDevTools()
        require('devtron').install()
      }
      [...]
    }
    [...]
When launching your app with NODE_ENV=development set, you will now find a Devtron tab in the DevTools, which shows you the intended information.
Application bundling
Commit: d0b7f30
After building our application inside our development environment, we want to distribute our app as platform specific packages. Package distribution in the Electron world usually works by packing all the necessary application resources together with the Electron binary for the specific target platform. The binary is renamed to the name of your application, so when running the resulting executable, Electron is started, locates your entry point (because it is noted in the package.json) and loads your application.
Conveniently there is a tool called electron-packager, which automates the process of packaging your application for different platforms and architectures and carries the responsibility for creating all the platform specific packaging formats, configuration files, icon formats, etc.
So let us install the tool
yarn add --dev electron-packagerand include it into our workflow by adding the following scripts to our package.json:
    "package:linux": "electron-packager . $npm_package_name-$npm_package_version --ignore=src --ignore=node_modules --ignore=e2e --ignore=.*\\.conf\\.js --ignore=\"(angular-cli|tsconfig)\\.json\" --ignore=webpack.*\\.js --out=packages --platform=linux --arch=all --overwrite",
    "package:mac": "electron-packager . $npm_package_name-$npm_package_version --ignore=src --ignore=node_modules --ignore=e2e --ignore=.*\\.conf\\.js --ignore=\"(angular-cli|tsconfig)\\.json\" --ignore=webpack.*\\.js --out=packages --platform=darwin --arch=all --overwrite ",
    "package:win": "electron-packager . $npm_package_name-$npm_package_version --ignore=src --ignore=node_modules --ignore=e2e --ignore=.*\\.conf\\.js --ignore=\"(angular-cli|tsconfig)\\.json\" --ignore=webpack.*\\.js --out=packages --platform=win32 --arch=all --overwrite ",
    "package:all": "electron-packager . $npm_package_name-$npm_package_version --ignore=src --ignore=node_modules --ignore=e2e --ignore=.*\\.conf\\.js --ignore=\"(angular-cli|tsconfig)\\.json\" --ignore=webpack.*\\.js --out=packages --all --overwrite"
These scripts create the application packages for the specified platforms in the directory packages and the --ignore flags prevents the inclusion of files, which are unnecessary for the package (some directories like your devDependencies or .git are ignored by default). Because Webpack already bundles our dependencies into the JavaScript bundles inside the dist folder, we don’t even need to include the dependencies in node_modules. You can also build your packages on your CI system to automate your application distribution, but it has to be said, that packaging for Windows on non-Windows systems requires Wine, which on the other hand may not deal very well with headless systems out of the box. You may also add the packages folder to your .gitignore file.
Now we have a completely configured project environment, for building an Angular-Electron App, with all the features, which are available through the Angular-CLI. We can now go on with creating our little app itself.
Building our app
Commit: 888a4d2
To make our app say hello we need to set the value of the title property in the AppComponent class in src/app/app.component.ts to our desired value, let’s say ‘Hello Electron!’
    [...]
    export class AppComponent {
      title = 'Hello Electron!';
    }
To make our tests pass, we need to set this text in the components test src/app/app.component.spec.ts as well es in the e2e test specification e2e/app.e2e-spec.ts.
After this we can build and run our app with
yarn run build && yarn run run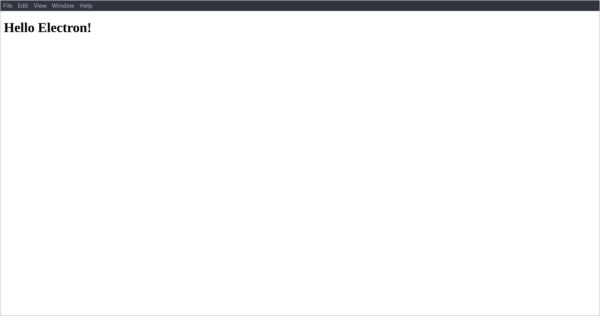
With this setup you can build powerful desktop applications, while being supported by the rapidly evolving ecosystem of Node.js, Angular and the Angular-CLI.
In the next article we will build a simple file explorer with these technologies to gain a deeper insight into the power of Node.js and the Electron API.