Preface
The automated testing of graphical user interfaces is an important topic. For each GUI technology, there are several libraries that need to be carefully selected in order to achieve a high-quality and accurate result in the shortest possible time.
When it comes to web technologies, there are many well-known frameworks such as Selenium, Playwright, Cypress and many more. There are also suitable alternatives for WPF or Winforms. Today I would like to introduce you to FlaUI.
FlaUI is a .NET class library for automated testing of Windows apps, especially the UI. It is built on the in-house Microsoft libraries for UI Automation.

History
Roman Roemer published the first version of FlaUI on Github on December 20, 2016. Version 0.6.1 was the first step towards a class library for testing .NET products. Since then, the library has been developed further with consistency and great enthusiasm in order to expand it with new and better functions. The newest version is 4.0.0 and it includes features such as the automation of WPF and Windows Store app products as well as the FlaUI Inspect tool, which reads and displays the structure of .NET products.
Installation
FlaUI can be downloaded and installed via GitHub or NuGet. For this article and the following example, I will also use other plugins/frameworks and class libraries such as:
- C# by OmniSharp
- C# Extensions by Jchannon
- NuGet Package Manager by Jmrog
- .NET Core Test Explorer by Jun Han
- The latest Windows SDK
- NUnit Framework
Example
For this example, I will use several different methods to maximize a typical Windows app, here the task manager, and restore it to its original state. Also, different elements should be highlighted.
While working on this article, I noticed that Windows exhibits a special behavior: When a program is maximized, not only the name and other properties of the button change, but also the AutomationID. As a result, I had to give the method calls two different transfer strings for the AutomationID, “Maximize” and “Restore”, which both address the same button.
Code (C#)
First of all, we start the relevant application and create an instance of the window for further use:
var app = Application.Launch(@"C:\Windows\System32\Taskmgr.exe");
var automation = new UIA2Automation();
var mainWin = app.GetMainWindow(automation);
Furthermore, we also need the ConditionFactory helper class:
ConditionFactory cf = new ConditionFactory(new UIA2PropertyLibrary());This helper class enables us to search for objects according to certain conditions. For instance, searching for an object with a specific ID.
As mentioned above, we want to maximize the program and restore the initial state in the following methods. We also want to highlight elements:
For the first method, we will work with FindFirstDescendant and FindAllDescendant. FindAllDescendant searches for all elements that are below the source element. FindFirstDescendant finds the first element below the source element matching the specified search condition and DrawHighlight creates a red frame around the element.
        static void FindWithDescendant(Window window, string condition, string expected)
        {
            window.FindFirstDescendant(cf => cf.ByAutomationId(condition)).AsButton().Click();
            var element = window.FindFirstDescendant(cf =>
            cf.ByAutomationId("TmColumnHeader")).FindAllDescendants();
            foreach(var Item in element)
            {
                if(Item.IsOffscreen != true)
                {
                    Item.DrawHighlight();
                }
            }
            Assert.IsNotNull(window.FindFirstDescendant(cf => cf.ByAutomationId(expected)));
        }
For the second method, we use FindFirstChild and FindAllChildren. Both function in almost the same way as Descendant, except that not all elements are found here, but only those that are directly below the starting element.
        static void FindWithChild(Window window, string condition, string expected)
        {
            window.FindFirstChild(cf => cf.ByAutomationId("TitleBar")).FindFirstChild(cf =>
            cf.ByAutomationId(condition)).AsButton().Click();
            var element = window.FindAllChildren();
            foreach(var Item in element)
            {
                    Item.DrawHighlight();
            }
            Assert.IsNotNull(window.FindFirstDescendant(cf => cf.ByAutomationId(expected)));
        }
And for the third method, we use FindFirstByXPath and FindAllByXPath. This is where we have to specify the path, as the name suggests. With First it should be the exact path to the desired element and with FindAll all elements found within the path are searched for. If you want to inspect an unknown program, it helps to use FlaUI Inspect, which can display properties such as the path, but also other information about elements of Windows apps.
        static void FindWithXPath(Window window, string expected)
        {
            window.FindFirstByXPath("/TitleBar/Button[2]").AsButton().Click();
            var element = window.FindAllByXPath("//TitleBar/Button");
            foreach(var Item in element)
            {
                    Item.DrawHighlight();
            }
            Assert.IsNotNull(window.FindFirstDescendant(cf => cf.ByAutomationId(expected)));
        }
Finally, we just need to call the methods and pass them the desired values. The first is the window that we created at the beginning and the second is the AutomationID of the maximize button, which changes as soon as the button is pressed.
       FindWithDescendant(mainWin,"Maximize", "Restore");
       FindWithChild(mainWin,"Restore", "Maximize");
       FindWithXPath(mainWin,"Restore");
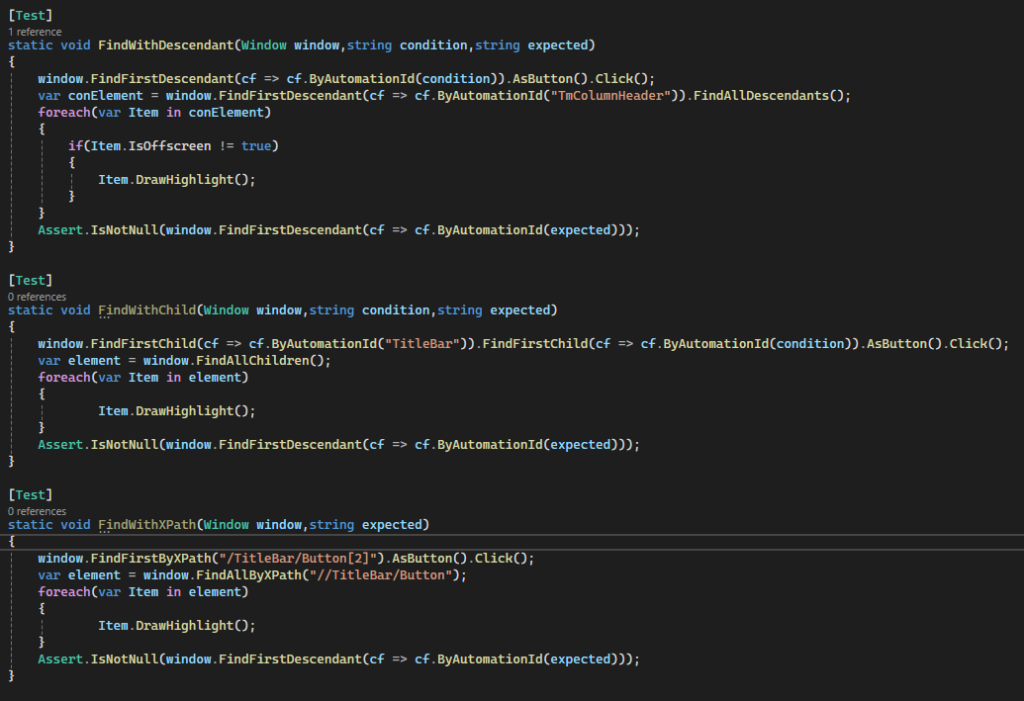
This looks as follows in my code:


Flaws
One problem is self-made objects, e.g. we had created buttons in a project with self-made polygons. These could not be found by either FlaUI Inspect or FlaUI itself, which severely limited their use in our automated tests. For such objects, an AutomationPeer (provides a base class that makes the object usable for UI automation) must be created so that they can be found.
Summary and conclusion
FlaUI supports Forms and Win 32 applications with UIA2 and WPF and Windows Store apps with UIA3. It is user-friendly and straightforward to operate, as it requires relatively few basic functions. Furthermore, it can be extended with your own methods and objects at any time.
Similarly, the software developers are satisfied because they do not have to install any extra interfaces and therefore no potential sources of error for test automation. Since FlaUI gives us the possibility to directly access the objects of the program to be tested, we do not need to spend additional time planning and managing major and error-prone adjustments to the existing program structure for testing.
On the other hand, in order to be able to address each object automatically, its AutomationID must be stored at least once in the test code so that it can also be used for the test. Consequently, the approximate structure of the program to be tested must be reproduced, which can be time-consuming, especially with more complex programs. And for the sake of clarity, these should be clustered in several classes with meaningful names.
We will definitely continue to use it and recommend it to our colleagues.