If you need your application written in C# to communicate with a C++ application, perhaps to read sensor data from a hardware component, then you have several options to choose from regarding this communication. This article will look at integration as a COM server. The following will focus on a C++-based COM server from a C# client.

Requirements
To follow this tutorial, you will need the following:
- Visual Studio 2019 or a newer version
- Visual Studio profile .NET desktop development
- Visual Studio profile desktop development with C++
The profiles can be selected and installed via the Visual Studio installer.
Step-by-step instructions: Integrating a C++ COM server with a C# client
Important: More detailed information can be found in this Github repository.
We will also create a C++ server:
Step 1: Create a C++ ATL project with executable file (.exe) as application type.
Step 2: Please delete the ComServerPS project.
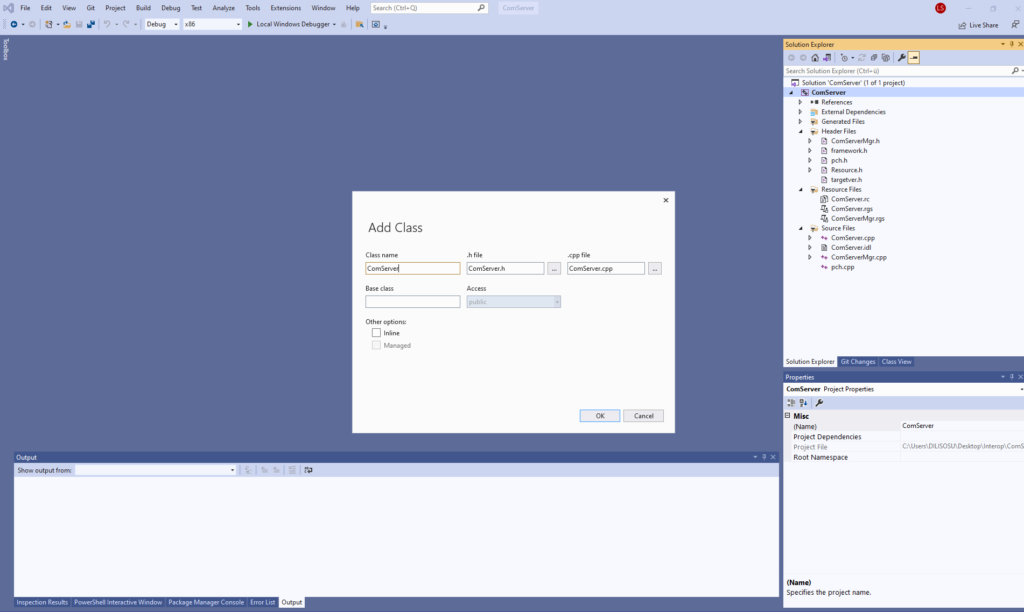
Step 3: Right click on the server and add a new class (ComServerMgr). This should result in the image below:
Step 4: Add the AddOne() method header in the ComServerMgr.h so that it can be inserted into the class:
public:
	CComServerMgr()
	{
	}

DECLARE_REGISTRY_RESOURCEID(106)


BEGIN_COM_MAP(CComServerMgr)
	COM_INTERFACE_ENTRY(IComServerMgr)
	COM_INTERFACE_ENTRY(IDispatch)
END_COM_MAP()


	DECLARE_PROTECT_FINAL_CONSTRUCT()

	HRESULT FinalConstruct()
	{
		return S_OK;
	}

	void FinalRelease()
	{
	}

public:
	STDMETHOD(AddOne)(int value, int* result);


};

OBJECT_ENTRY_AUTO(__uuidof(ComServerMgr), CComServerMgr)
Step 5: Add the AddMethod() in the ComServerMgr.cpp. We will use those later to increment the given value by one:
STDMETHODIMP CComServerMgr::AddOne(int value, int* result)
{
	int res = value + 1;
	if (result != nullptr)
	{
		*result = res;
		return S_OK;
	}

	return S_OK;
}
Step 6: Add the AddMethod() in ComServer.idl as well to make it known:

Step 7: Build the project. Now go to the directory on the hard disk where the source code is located and select the subdirectory Build. ComServer.exe should now be located there. Now open the command prompt as administrator and enter the following command:
ComServer.exe /Regserver
Please note that ComServer is the name of the project. If, for example, the project is called “HelloWorld”, then the command should read: “HelloWorld.exe /Regserver”.
Now we will create the C# client.
The process is simpler than that for the COM server:
Step 1: Create a console application.
Step 2: Add the COM reference.
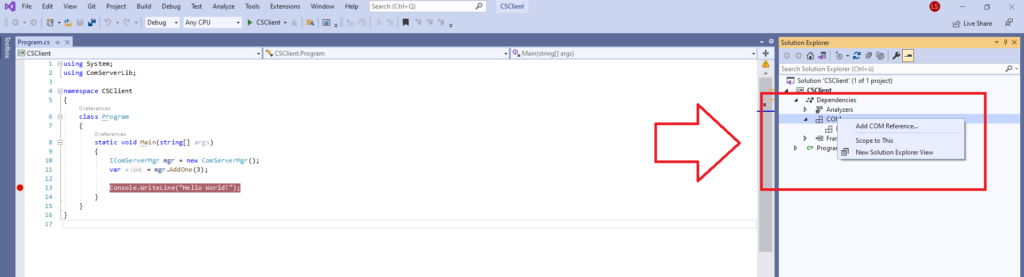
Step 3: Scroll down until the ComServerLib reference is visible:
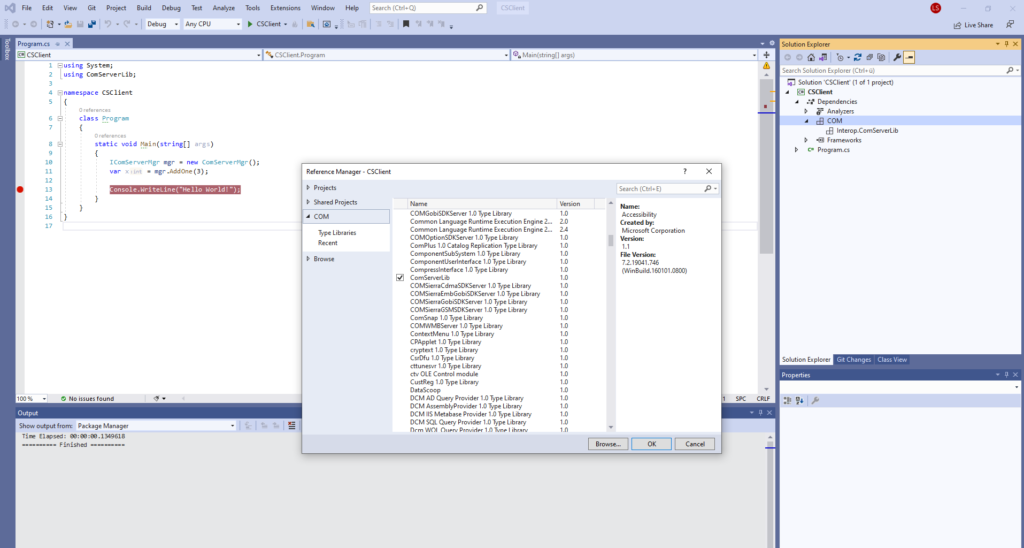
Please note that the reference is called ComServerLib because the server project is called ComServer. If, for example, the project is called “HelloWorld”, the reference would be HelloWorldLib.
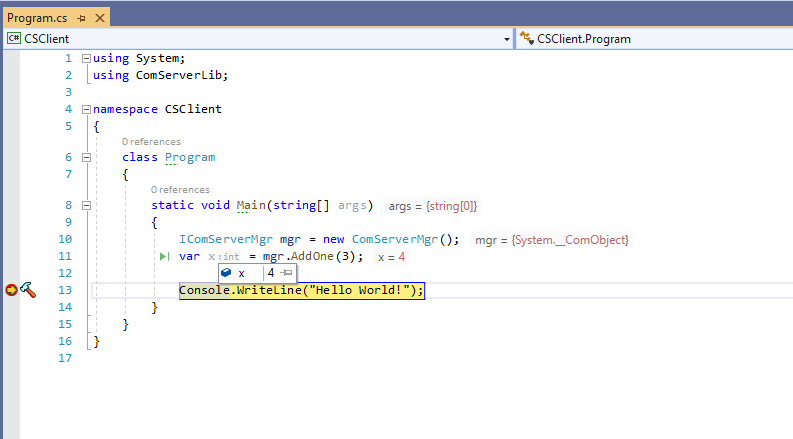
Step 4: Add the following code that instantiates the COM server when the console application is started and then passes the number 3.
    class Program
    {
        static void Main(string[] args)
        {
            IComServerMgr mgr = new ComServerMgr();
            var x = mgr.AddOne(3);

            Console.WriteLine("Hello World!");
        }
    }
Step 5: It is also possible to run the code in debug mode and with a breakpoint to make this easier to follow. The execution will then stop at the appropriate point.
Summary
Admittedly, the example was very simple, but it demonstrates how to establish a connection between COM servers and C# applications. This is very useful particularly prior to legacy applications, which unfortunately rarely come with any documentation explaining the procedure.
If you have any questions, please feel free to contact me at liviu.sosu@zeiss.com.
Thanks to Florian Seeleitner for his helpful support.