Preamble
.NET Core is still a new technology and people might ask themselves questions like “how applicable is it in a real- life scenario?”, “how convenient is it to set up?”, “what do I need to configure, to get a build-pipeline up and ready?”, “do I need any tools aside from the official .NET Core SDK?” … therefore I want to share my gained experience while setting up and configuring a “Microsoft-friendly” build- controller and agent scenario. It is based on the regular Microsoft technologies including Team Foundation Server 2017 and Microsoft Windows VSTS build agent, both hosted on Microsoft Windows Server 2016.
Prerequisites
Build controller
• TFS 2017
Build agent
• VSTS-Agent win-7-x64-2.112.0
• .NET Core SDK 1.0.3 for Windows
Although it is not the cheapest way to implement a .NET Core build pipeline, it is also not the most expensive one, since we are not installing any Visual Studio stuff inside the build agent. And yes you arguably could host a vsts build agent inside a linux for example but that setup will be mentioned in a seperate blogpost. Alright lets not go any further into licence and pricing discussions and jump right to the technology part.
Set-Up
First of all you need to establish a controller-agent connection so all the neat build data is captured and processed correctly. There are 4 different ways how you can do it which are explained here:
See http://go.microsoft.com/fwlink/?LinkID=825113 for more detailed information.
After you are done with that, connect to Build-Agent-Host via remote desktop and download/install the .NET Core SDK.
See https://go.microsoft.com/fwlink/?linkid=847097 for more detailed Information.
Make sure that the dotnet.exe path is added to the PATH environment variable and you can call it from the cmd/powershell.
At this point you are pretty much done with your build agent configuration and you can jump right into your TFS source controlled .NET Core project and add a default .NET Core build definition.
Build configuration
If you are using the ASP.NET Core (Preview) build template to add a build definition, then you should follow these steps below.

After you added the build definition modify the single tasks according to your project root structure as it is shown below. Keep in mind that all the commands are seperate tools which are composed inside the .NET Core CLI Toolchain.

The restore command is mapped to the integrated NuGet, we use the verbosity flag to display the „used nuget feeds“ information.

The build command is mapped to integrated msbuild. The $(BuildConfiguration) variable gets replaced before the actual target gets executed on the build agent. It should either be replaced by „Debug“ or „Release“.

The test command is mapped to vstest.console or to xunit.console depending on your configuration.
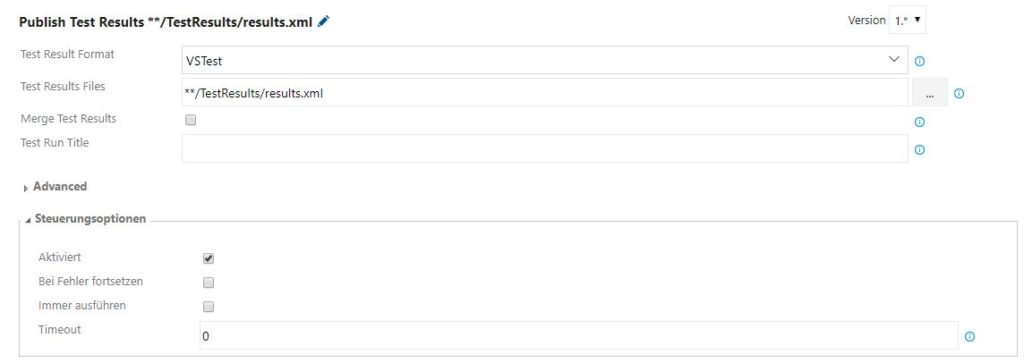
Notice that the test command requires an extra logger parameter in case you want to capture and print test for publishing reasons. Now you need to add the „Publish Test Results“ step and configure the path wildcards/naming in a way that it grabs the results.xml file produced by your vstest.console logger.


After you queued up and finished your build you should get a report which should look similar to the one below.

Conclusion
So at the current .NET Core SDK and TFS state, there are still minor configurations required to get your pipeline going. Regardless, the installation effort is very minimal and intuitiv in my opinion and the alternative to host a .NET application on a Linux OS instead of Windows should make a ton of people happy! So give it a try ????.
Building .NET Core Applications and enjoy it!